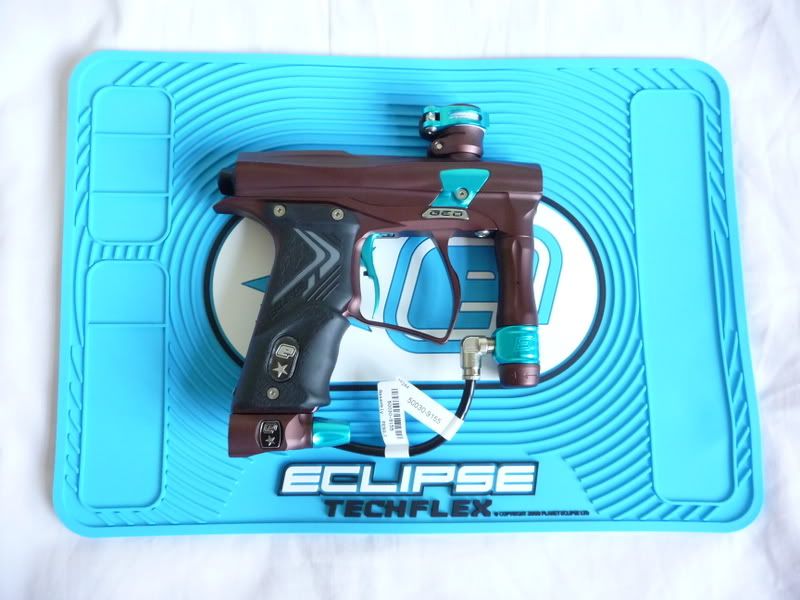
I was lucky enough to have recently been invited to visit Eclipse in Manchester (for once, being in the UK has not been a bad thing! ), and this time, I was allowed behind the scenes.....
Before I go any further, I would like to give my thanks to all at Planet for making me feel welcome, and in particular to Nicky for arranging my visit, and to Matt (jahlad) and Robert (probert) for talking me through the production and technical aspects of Planet products in general and the Geo in particular.
I'd love to show you some photos, but as it happens, most of what I saw has been published before, so there wasn't much point. The one new thing I did see, I wasn't allowed to take a photo of anyway.....
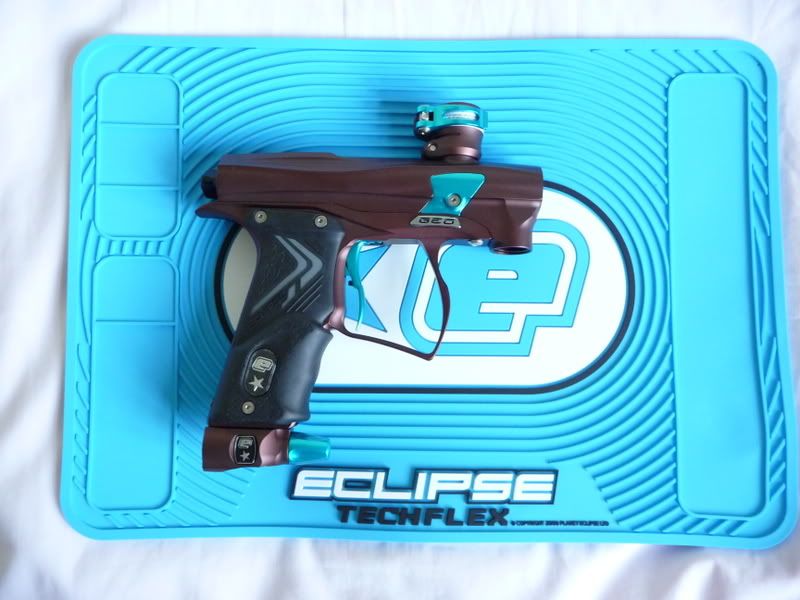
I was given a full tech rundown on the new Geo, and have been lent one to tinker with, and as such, the new Geo is the subject of this thread. I'll be doing some comparison of it's features with the Ego markers, and stripping the marker.
*****
First things first, a brief explanation of the function of the Geo is in order. Apologies if some of this covers old ground, but this thread was written for posting on PBReview, where there is much less information about the Geo and Ego9, so some of this is already well known here.
It is an unbalanced spool valve marker, with a bolt kit that resembles the Deadly Wind Hollow Point bolt for the Ion. There are differences of course, but it is a hard comparison not to make.
The marker as a whole though, is a very different prospect to an Ion, being that it is all metal, made to a high level of quality, and tested through out it's creation to ensure that Planet's standards are met. You also have the roller bearing trigger with multiple adjustment points, a custom solenoid, DefTek feed neck, LCD board, optical or microswitch trigger activation, etc. - all the features that you have come to expect on the newer Egos, you will find on the GEO. There are no QEVs, but then, there aren't on the Ego9 either, and there won't be - the new '09 series design and custom solenoids make QEVs unnecessary.
There is no LPR on the Geo, with air being supplied at the same pressure to the front of the bolt (to hold the bolt open), and to the back (to fill the firing chamber to shoot the ball) - 130psi. The bolt is held open, despite the same pressure, due to the surface area of the front of the bolt being larger.
When the trigger is pulled, and the solenoid activated, the solenoid first shuts off the air supply in to the solenoid - this means that the GEO shoots from a fixed volume of gas; at the same time, the solenoid vents off the gas in front of the bolt. Air in the firing chamber is prevented from venting out through the solenoid by a back check valve built in to the solenoid.
With the air in front of the bolt having been vented, and the air in the firing chamber trapped by the back check, you now have nothing to stop the 130psi of pressure in the firing chamber pushing the bolt forward. As the bolt moves forwards, the air in the firing chamber is released to shoot the ball.
*****
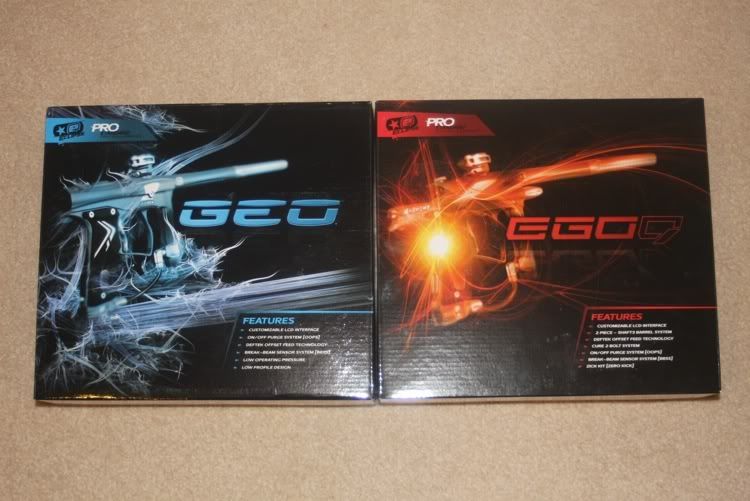
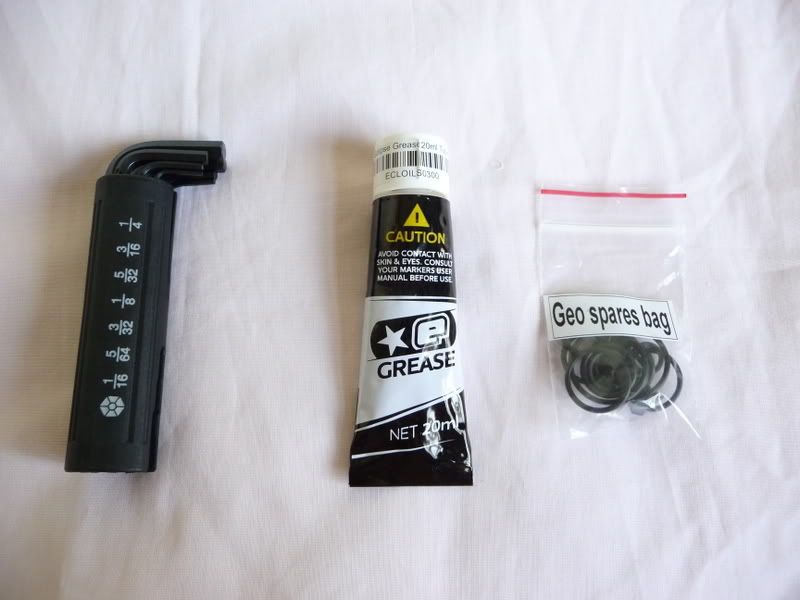
I would have liked to start by showing you the box, then the case, the marker nestled in the case, but, erm, I can't..... Nicky thrust the marker in my right hand, while Matt the production manager shoved a tube of grease, barrel sock, spares kit and tool kit in my other hand! No box or case. However, the box would look like this: -
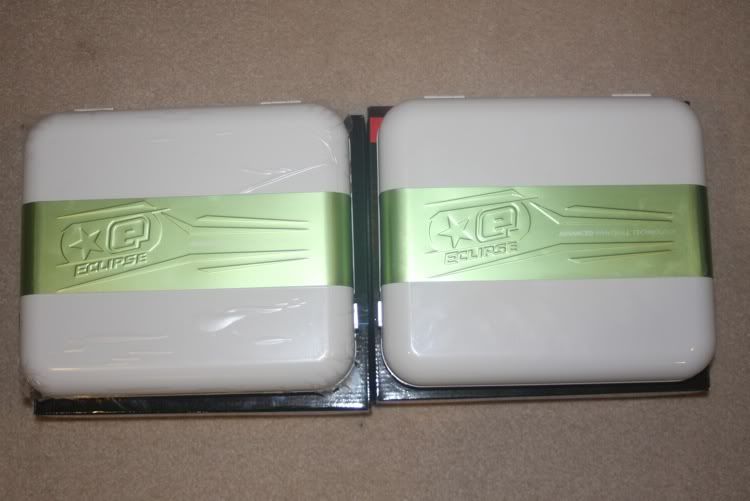
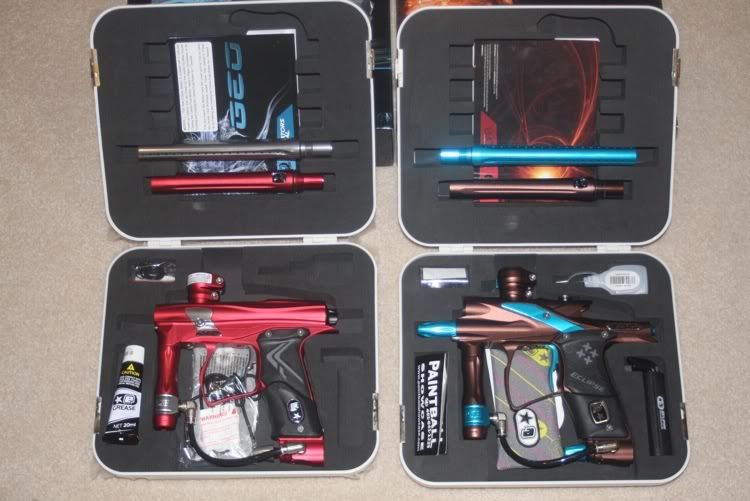
The above pictures were taken by PBKIDD24.
There are cases with a selection of different colour anodised bands available, which are supplied at random.
*****
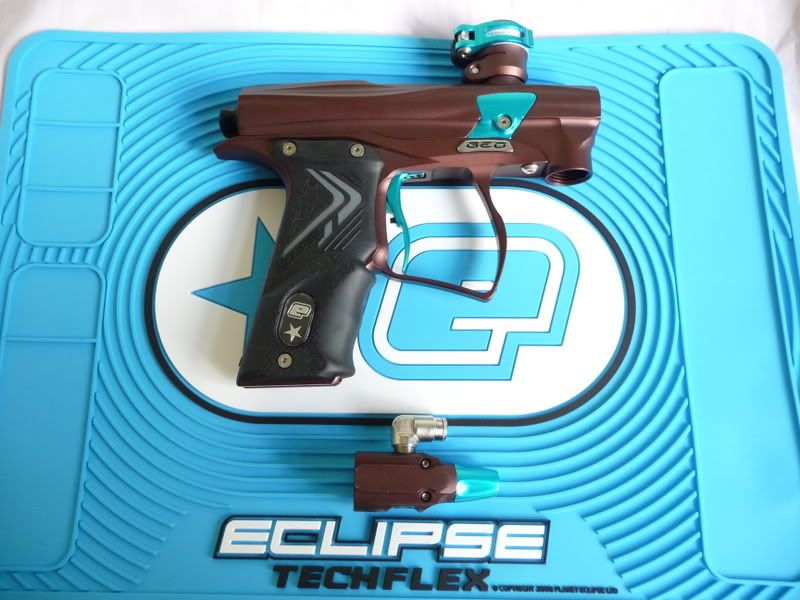
OK, back to the Geo in front of me.
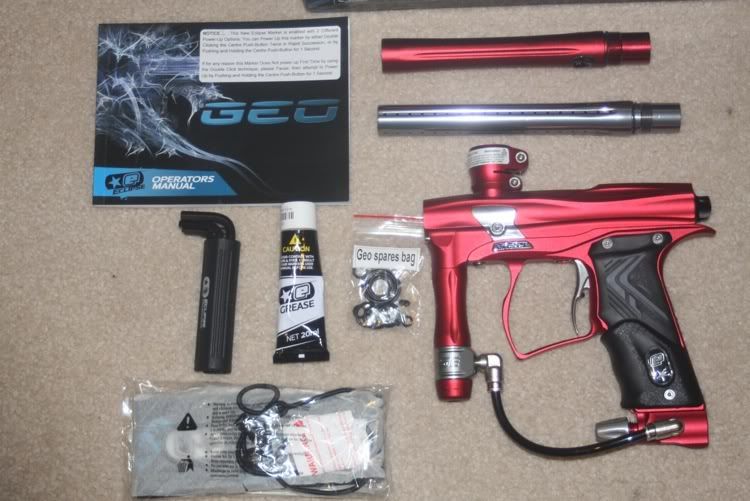
In my best Nick Truter video voice "Here are the tools for the job": -
All included with the marker.
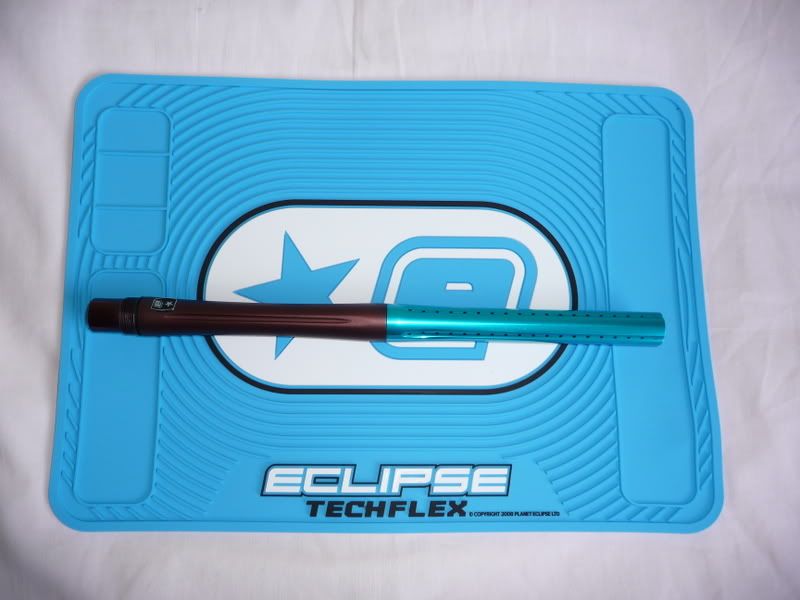
I guess that the first thing that deserves a mention is the new Shaft 3 barrel. It is a two-piece barrel, and reverse threaded, like the Shaft 2 before it, and the 2-piece Shaft before that. It has the same threading and dimensions as the Shaft 2, and so parts are interchangeable. It has been stated that optional bore backs will be available separately, though there is no release date on these as yet.
Stock bore size is 0.693, and the alignment from front to back is very good (considerably better than my SL kit in fact ), so there should be no chance of your ball clipping the end of the barrel front, or rolling along the barrel front and picking up a spin.
*****
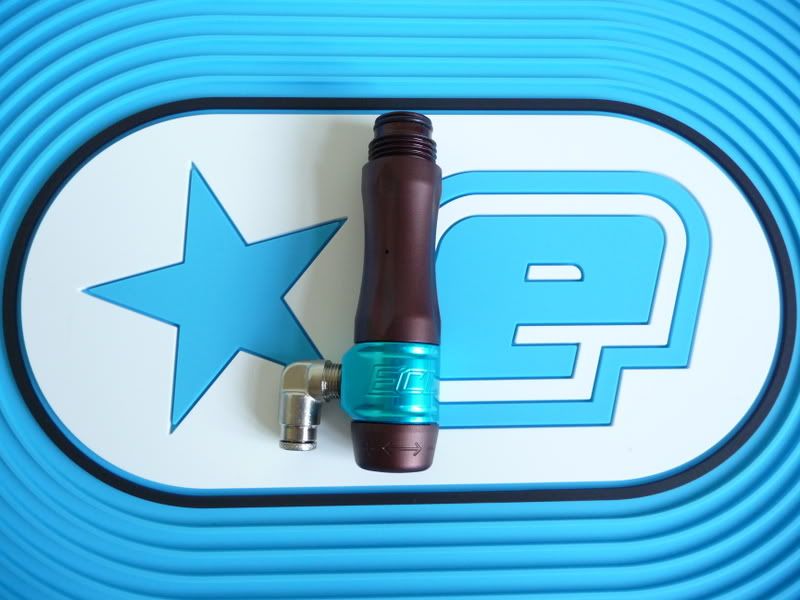
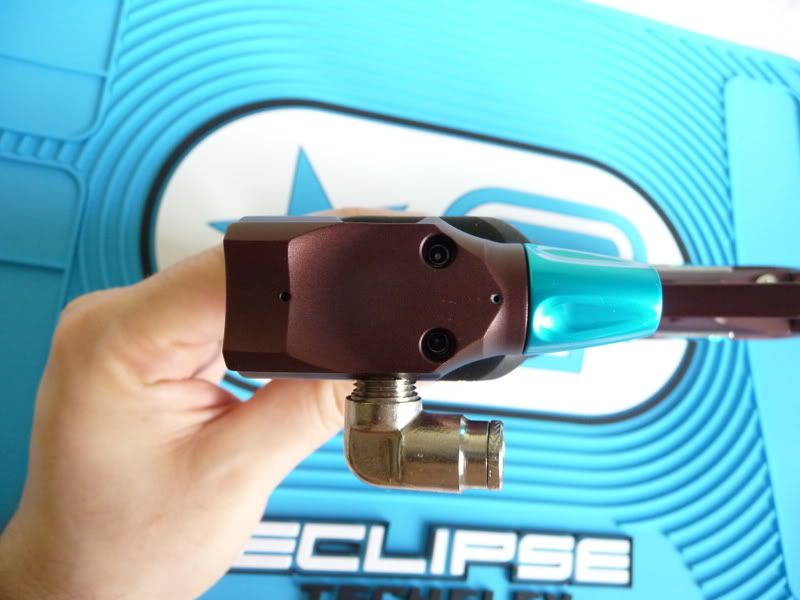
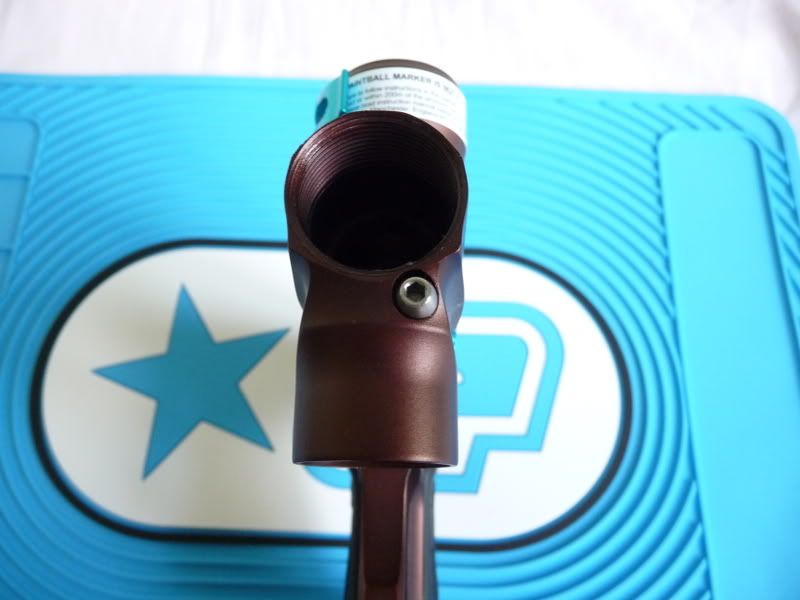
In order to start stripping the marker, we can first remove the barrel, and then the regulator.
This is as good a time as any to service the regulator.
*****
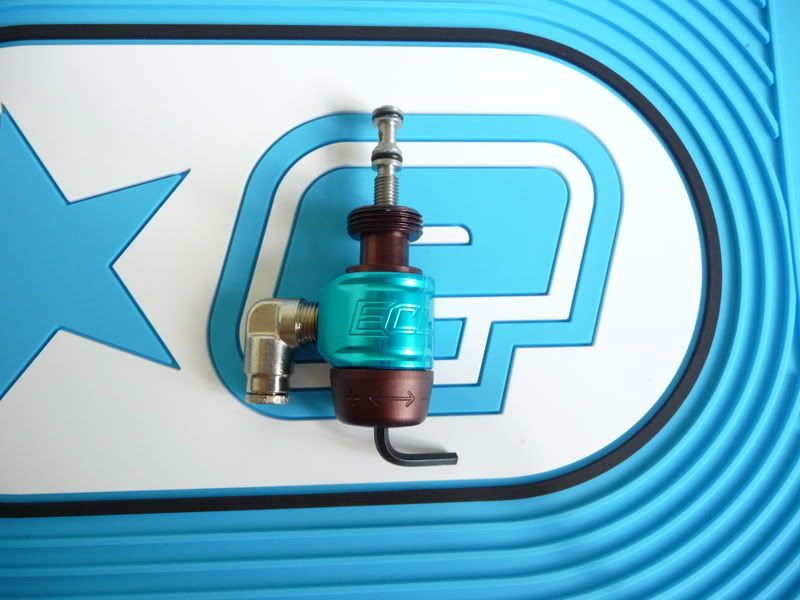
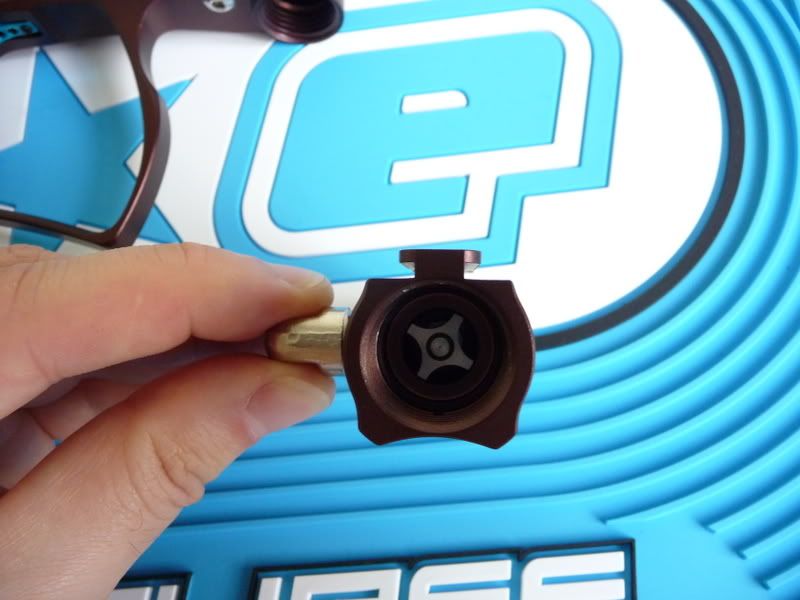
The regulator is of the "gas-thru-piston" design, as has been utilised on all the Ego markers, but has some new features for the 2009 season.
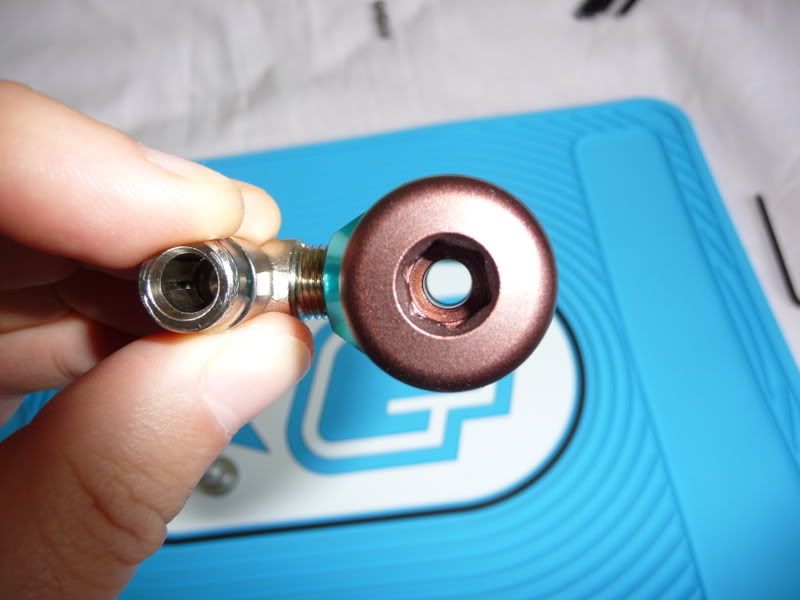
The bottom cap can be eaily unscrewed by hand, but like all the later Ego regulators, hex key holes are provided in case the end cap is screwed on tightly. The large allen keys required to disassemble an overtightened reg are not included, but shouldn't really be required anyway. The allen keys for all other parts of the Geo are included.
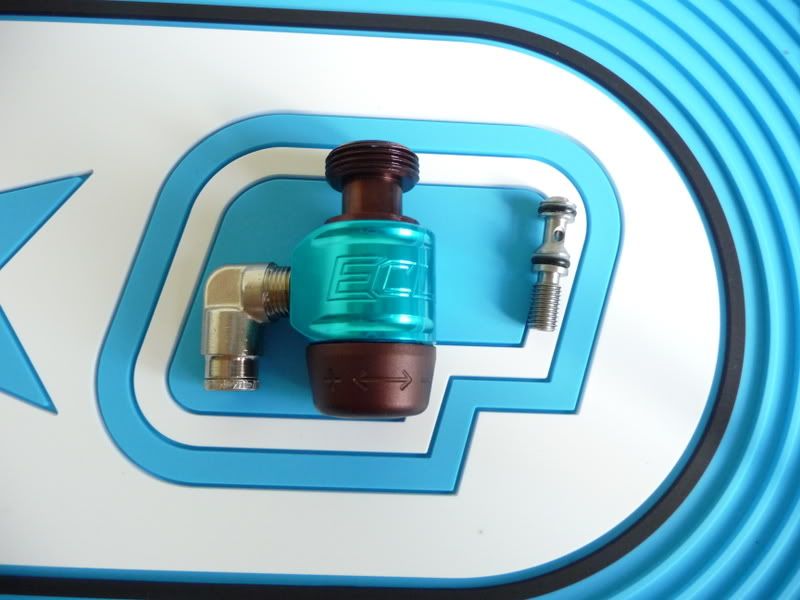
Having removed the end cap, we can then proceed to remove the velocity adjuster screw. This can only be removed through the top of the end cap, by screwing the adjuster in all the way with an allen key, and then pushing it out.
Note the markings on the bottom of the reg to show which way to turn the allen key to adjust output pressure.
Last edited by Uziel Gal : 09-05-2009 at 07:52 AM.
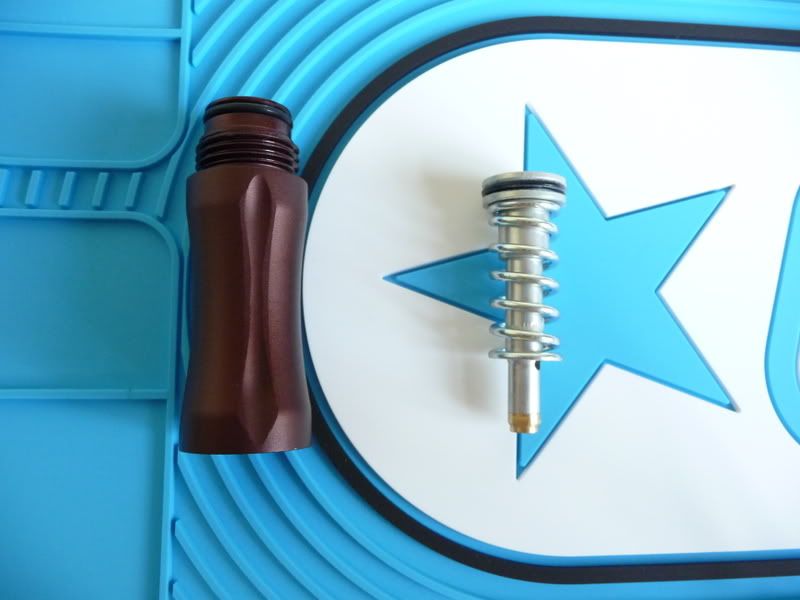
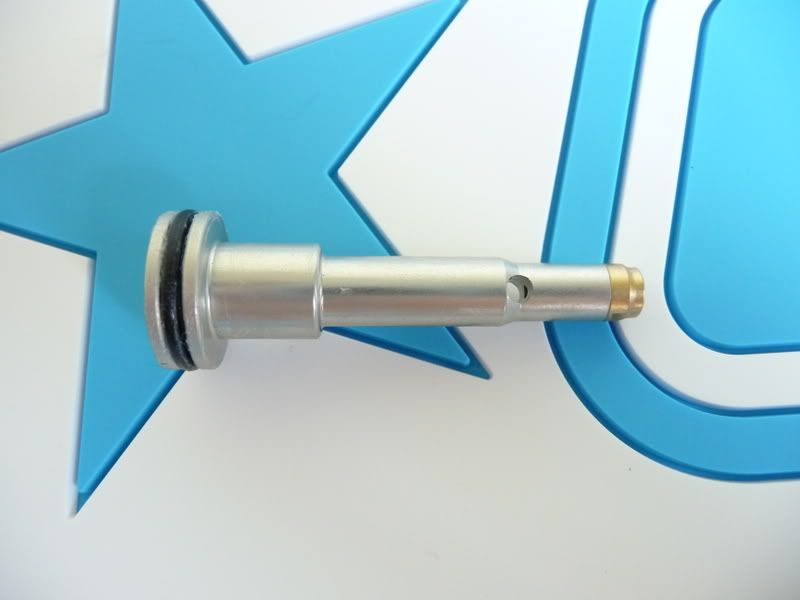
You can now pull the piston out of the bottom of the reg body, which will in turn bring out the reg spring with it.
The spring is made to give the reg an output pressure of 160psi maximum (out of the box operating pressure is 130psi or so), and so the reg isn't suitable for use with just any marker, and the spring is different to that found in other coil spring Ego regulators - it is Geo specific. Unlike earlier Ego coil springs, the Geo spring can go in to the reg either way up, it makes no difference.
The reg piston incorporates the first new reg feature (unless you include the Geo specific spring as a feature).
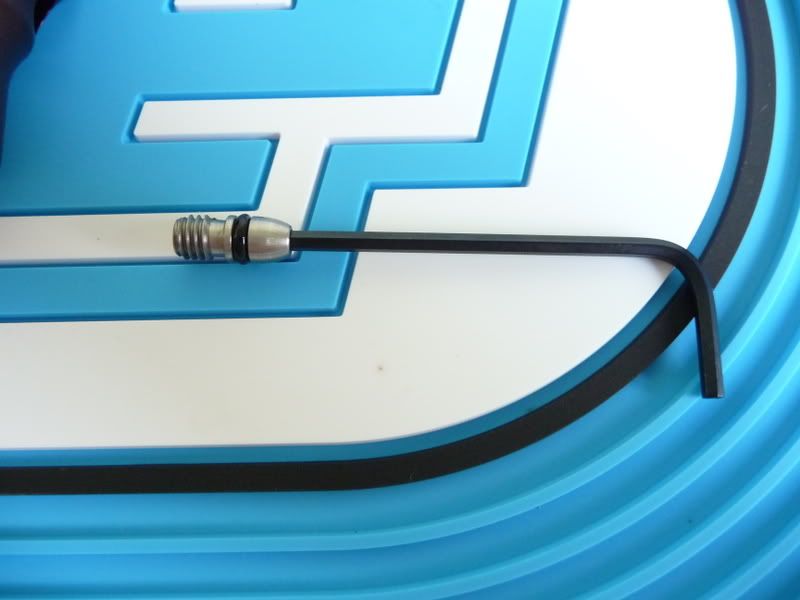
The brass tip of the piston incorporates a relief valve. This stops the reg acting as a one-way valve and trapping air in the marker. De-gas the ASA, and you will also de-gas the reg.
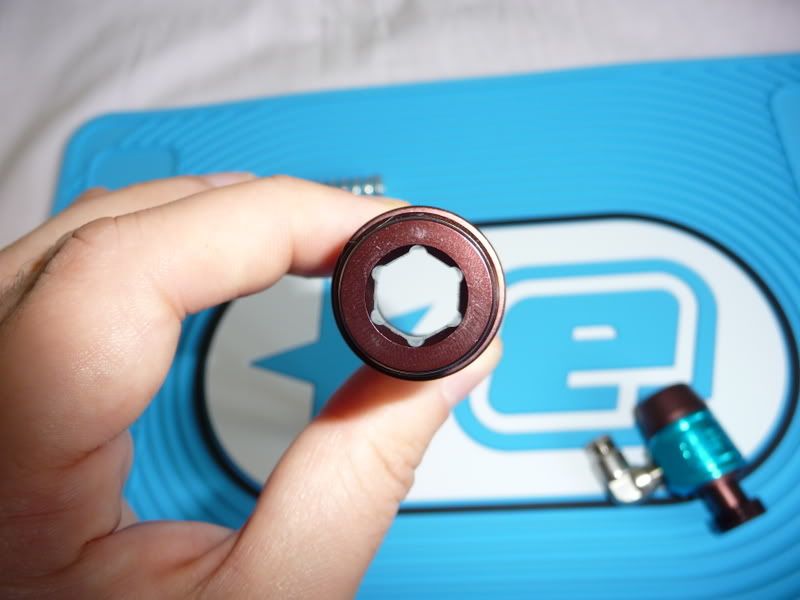
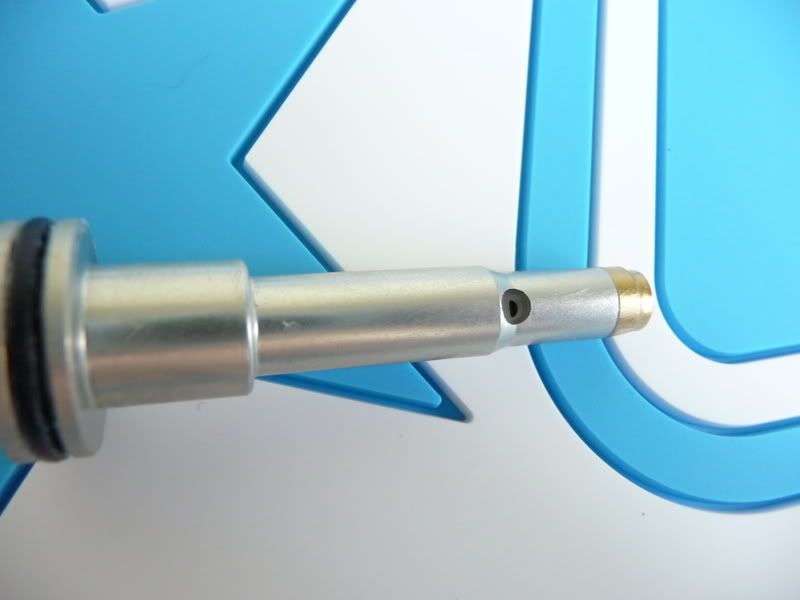
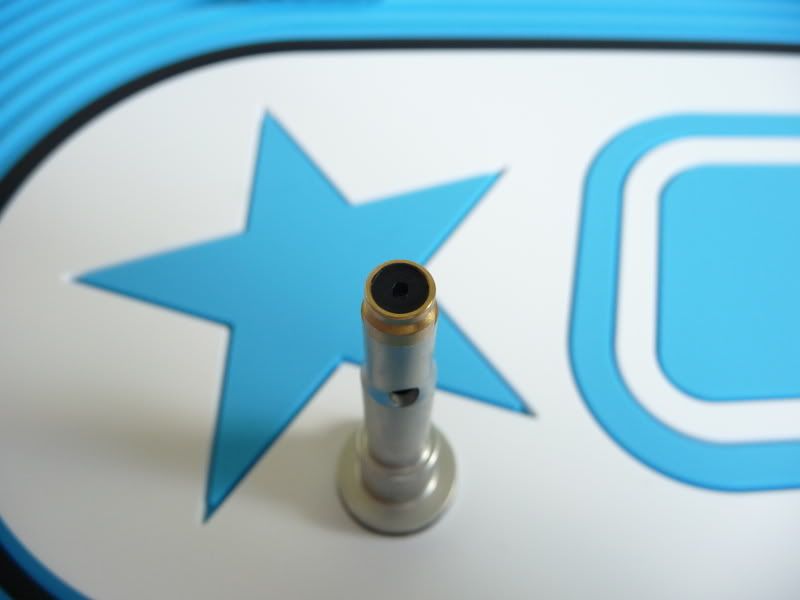
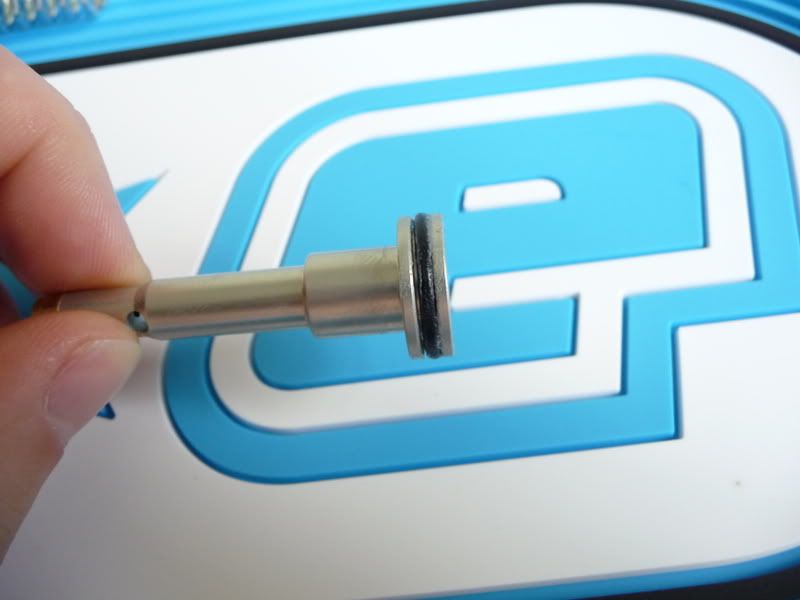
The relief valve is *not* user servicable, and the brass tip should not be removed from the piston, but I can tell you that behind the cap, there is a spring inside, and above the spring, there is a small plunger that blocks a hole drilled through the piston. You can just make out that hole here: -
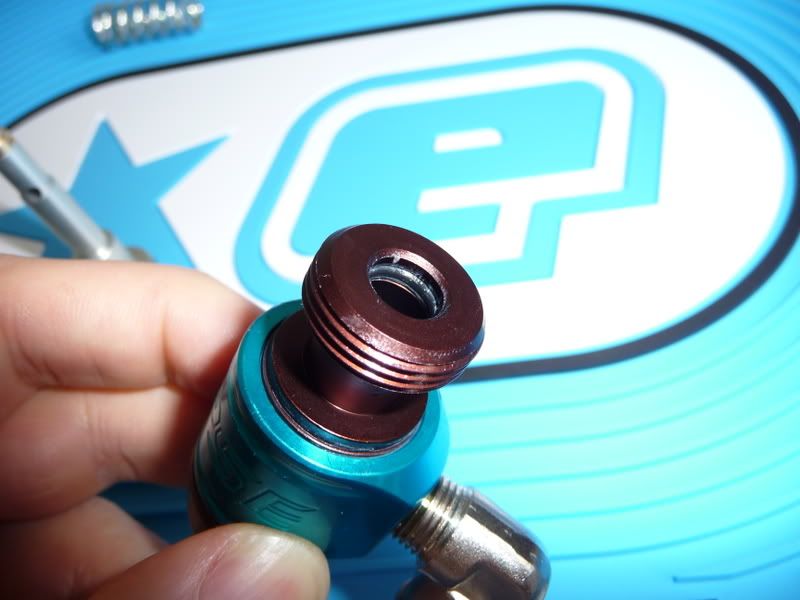
This is matched with a hole in the reg seat seal: -
When air enters the reg at 450 or 800psi, or whatever your air system reg pressure may be set at, it enters the hole in the reg seat seal, and pushes the plunger against the hole, stopping air entering or leaving the reg through the bottom of the piston. The air then enters the holes in the side of the piston neck and is regulated as normal. So far, so ordinary gas-thru-piston regulator.
However, things are different when you de-gas your marker. The 450/800/what-have-you psi is released, so there is nothing other than a light spring holding the plunger closed. The 130psi in the marker is then free to push open the plunger, and so it can vent out of the marker, through the relief valve, and so can vent out of the regulator. So now, when you degas your ASA, you are fully degassing the marker - it won't be able to fire a shot after degassing.
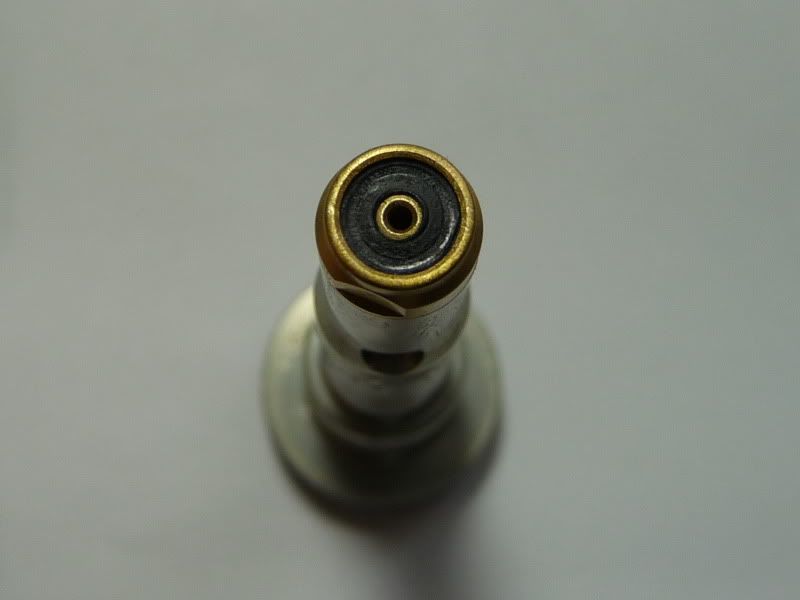
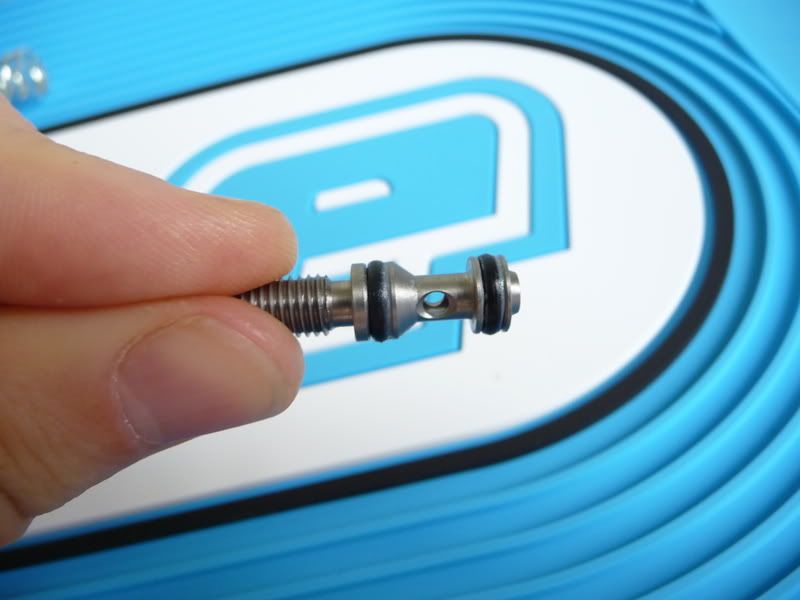
This picture shows the newer version of the Geo reg piston, as supplied with the G-R2 upgrade kit, and supplied as standard with newer Geos. Some people were having problems with the venting air lifting the reg seat seal, which could lead to inconsistency, or - worst case scenario - supercharging of the reg. A spigot is now machined in to the brass tip of the reg that extends through the hole in the centre of the reg seat seal, helping it to stay in place. This gives the seal the "brass lined" look that the picture shows.
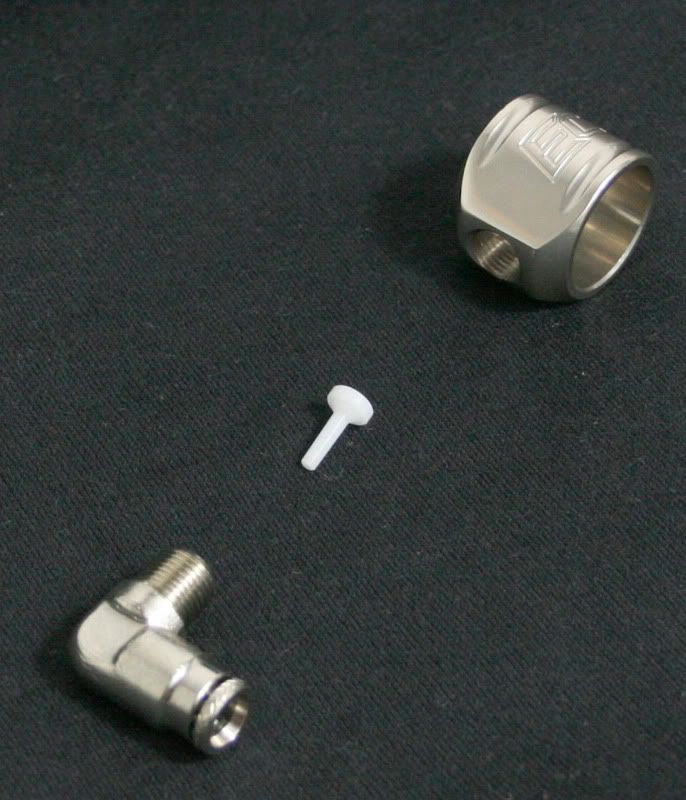
If you wanted to remove the reg collar, you would first need to remove the elbow. Removing the elbow would reveal the second new feature. It is a small golf tee shaped piece of plastic that sits inside the elbow. There is a small hole drilled through this piece.
Images provided by Nicky T.: -
This allows air to flow freely in to the reg as air will simply push the "tee" forwards and away from the elbow. When the reg vents, and air tries to rush back out through the elbow, the tee will block the elbow, and air has to slowly vent through the hole down the middle of the tee.
This is important, as if the air in the front of the bolt were to vent quicker than the air in the firing chamber (as it would, quite simply down to the difference in volume), once the air in front of the bolt was gone, the air remaining in the firing chamber could push the bolt forward, and effectively fire the marker. By releasing the air gradually, you prevent a sudden change of pressure on the two sides of the bolt, and the marker won't fire when the air is vented.
Tech Tip #1 - if you are going to change the elbow, make sure to install the tee in the new elbow before re-assembly.
Tech Tip #2 - very similar. If you come across a Geo that fires when it is degassed, make sure that the tee is present in the elbow.
Getting back to the reg itself, you can now clean out the empty reg body, and wipe the old grease off of the piston and reg adjuster o-rings. Check the o-rings for wear, and replace if necessary. Then re-grease them.
The piston neck o-ring is actually inlet in to the top of the reg end cap, rather than being on the piston neck. This should also be cleaned, checked and re-greased: -
Tech Tip #3 - if your HPR pressure is creeping up, check the reg seat seal on the end of the piston neck, and the reg seat (the port on top of the pressure adjuster), for dirt or damage: -
In order for the regulator to stop at a fixed pressure, there has to be no leaking between the reg seat and seal - if pressure can leak passed this seal, then your reg pressure will start to increase. This means that the seat and seal must be clean, and there can'd be any dents or scratches to break the seal.
Grease the o-rings with Eclipse grease, or Sl33k if you have none of the Eclipse grease. The reg can then be reassembled in reverse order - piston in to the body, followed by the spring; drop the reg adjuster in to the end cap, push it down, and screw it in; screw the end cap on to the reg body: -
Finally, having screwed the adjuster all the way down, screw it back in four turns - this should give you approximately 130psi output.
*****
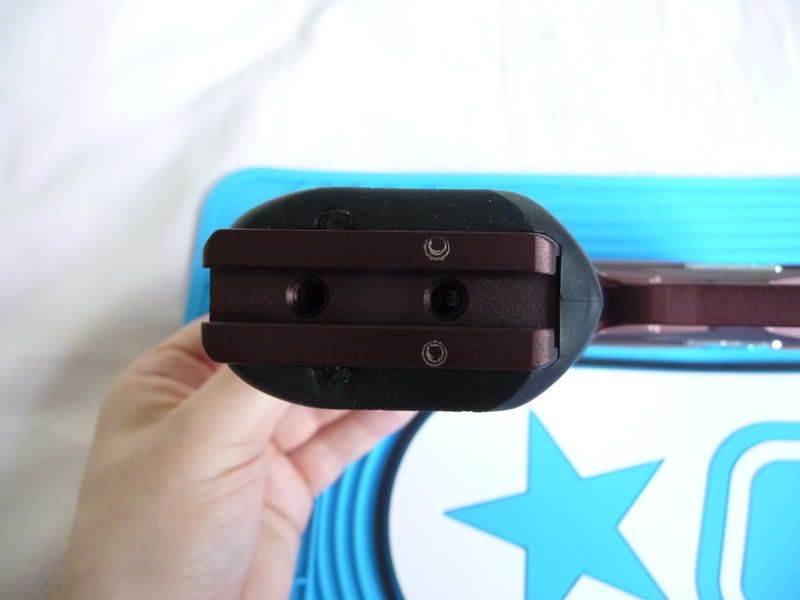
Not strictly necessary, but if you want, you can remove the ASA.
There are two screws that push against the bottom of the frame to press the ASA's T-rail in to the frame's T-slot.
Loosening the two screws allows the ASA to slide out from the frame.
There are still standard ASA mounting holes if you don't want to use the T-slot rail.
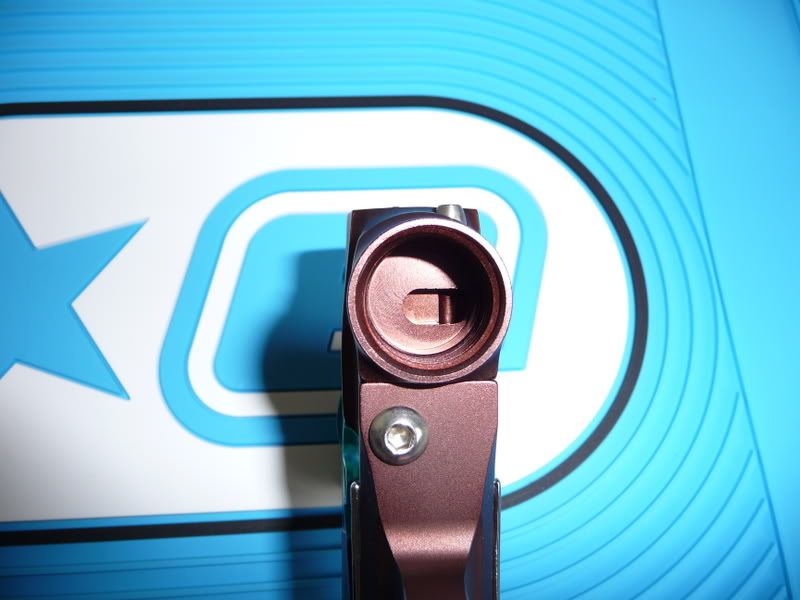
For those who haven't seen the T-Slot rails before, a T-shaped slot is cut in to the bottom of the frame, and a matching rail is incorporated in to the ASA: -
*****
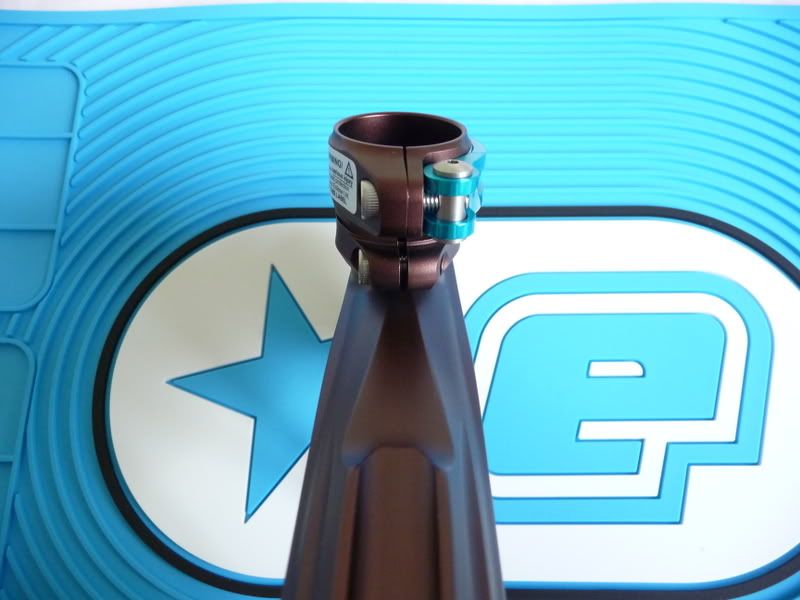
As with the Ego markers, you have the DefTek (deflection technology) feed neck, to prevent paint trying to bounce back up the feed neck - it should assist feeding, and should help to prevent chopping. The neck is actually offset slightly to one side. It's hardly noticeable unless you look for it.
As with the newer Ego models, the lever clamping feed neck is stock.
Last edited by Uziel Gal : 09-05-2009 at 07:55 AM.
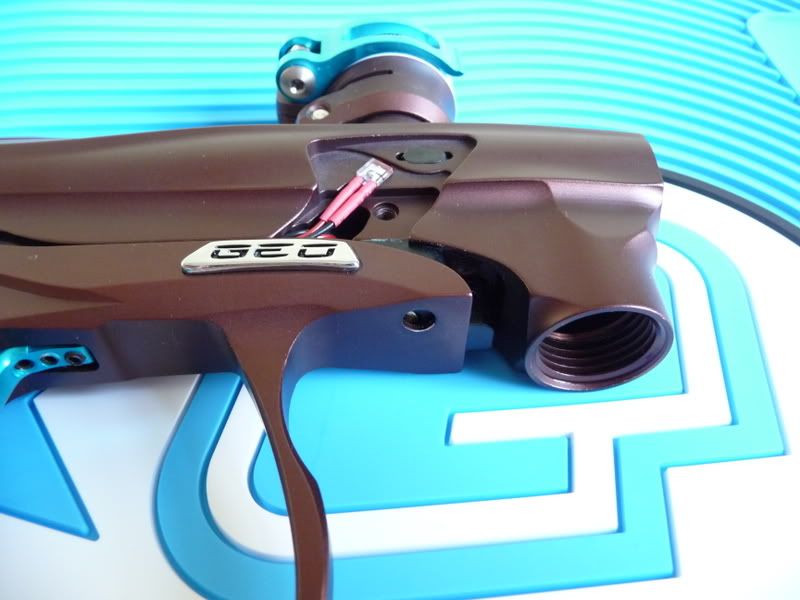
While we are dealing with DefTek, it is worth mentioning the eyes. You have the same break beam eye harness as found on the Ego markers. As I was reminded by Robert - who gave me my quick, unofficial tech class - the red coloured eye should go on the right; 3Rs - red, receiver, right. This is as a consequence of the DefTek feed neck. The eyes can be confused by external light sources, so by placing the receiver element on the opposite side to the feed neck offset, you shelter it as much as possible from light coming through the feed neck.
Red on the right.
Black on the left.
The left hand eye passes through a tunnel under the breech: -
The eyes should obviously be cleaned if dirty, and while you have the eye covers off, you can check the condition of your ball detents. The Geo uses the same detents as all Egos from '06 onwards.
*****
Brief break as I shoo away my cat: -
It's not even Caturday!
Giant cat or small marker?
*****
OK, on to the marker body.
Like the Ego7 and newer models, the front reg mount is integrated in to the body, rather than being removable. As stated at the beginning, there is no LPR, so no LPR body, no additional o-rings to worry about, no hosing. There is something at the front of the marker that looks suspiciously like an Ego's Torpedo fitting, but it is just a plug to block an air passage.
The air passage feeds vertically from the FRM, and then horizontally to the solenoid; the horizontal airway is drilled from the front of the marker - hence the plug.
Tech Tip #4 - if air is leaking from the plug, remove it, clean and grease the o-ring and replace the plug. If the plug still leaks, replace the o-ring. Bar a leak from the plug itself, there is absolutely no reason to remove the plug.
All air goes through the solenoid - both the air to fill the firing chamber and the air to push the bolt back. This makes for a very simple marker, though quite a complicated solenoid.
*****
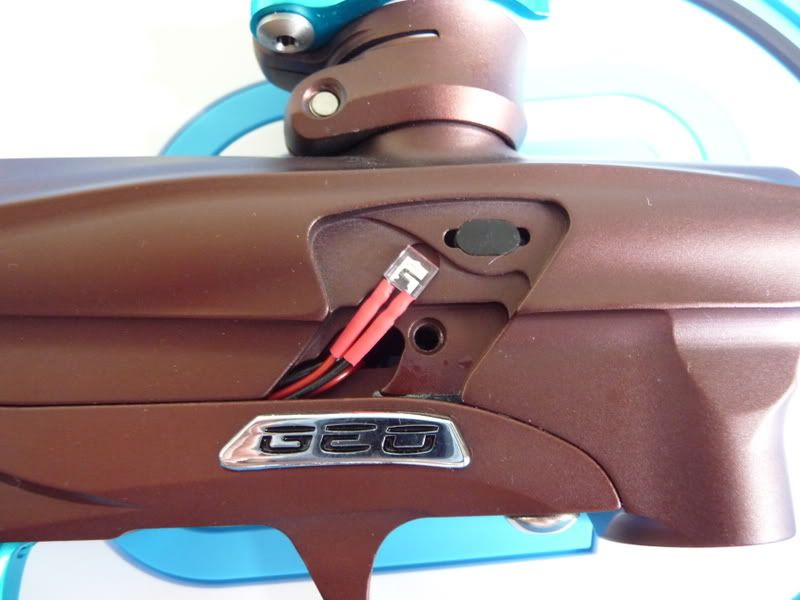
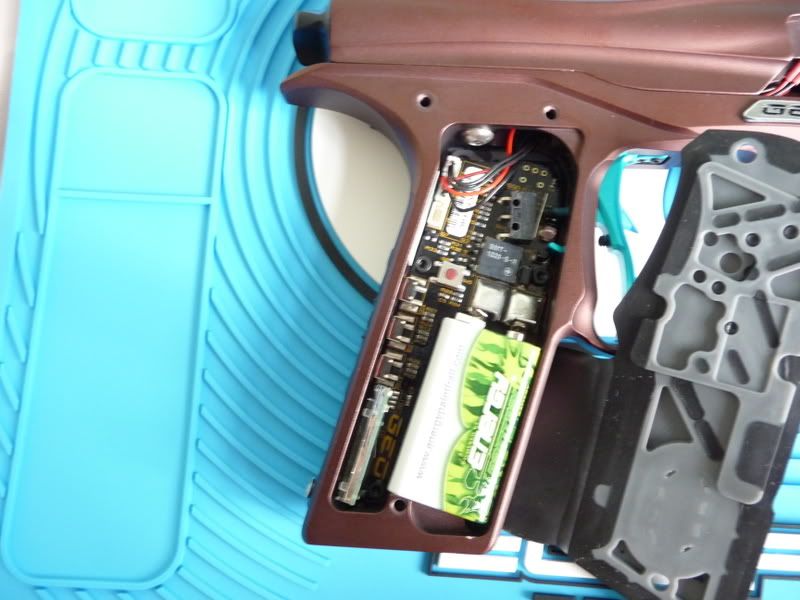
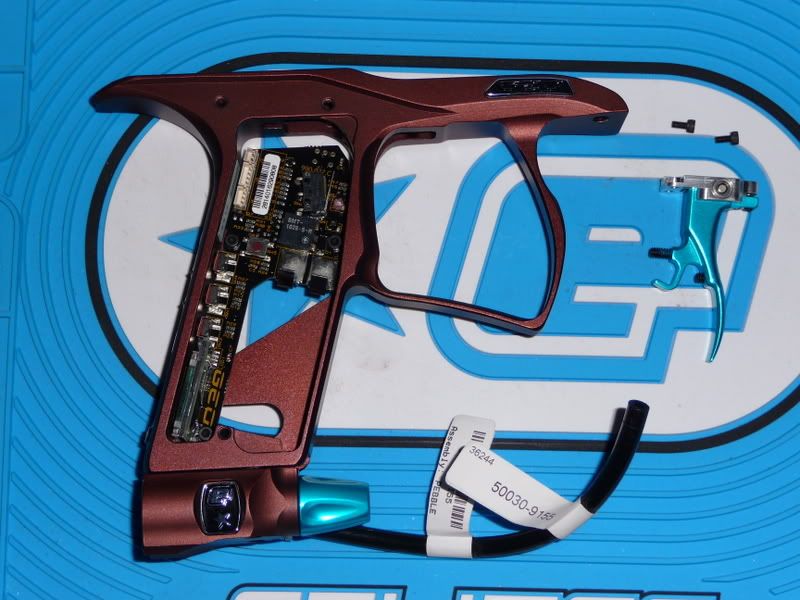
For the next step, we need to remove the frame from the marker body. This first requires that we remove the grips to uncover the board - we need to unplug the solenoid and eye wires from the board.
This involves removing a total of six screws, three on either side of the frame. At a pinch, you could just remove the three screws on the right side of the grip, but I would rather have the grip out of the way entirely: -
*****
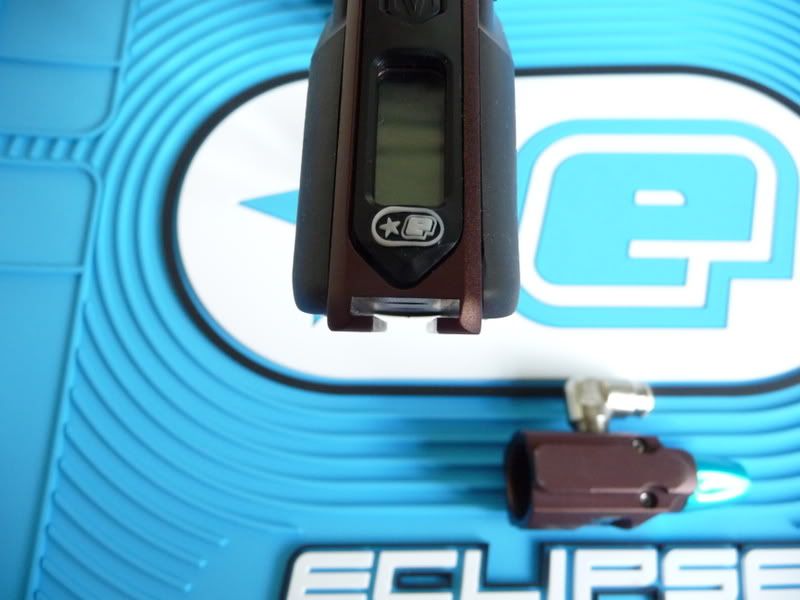
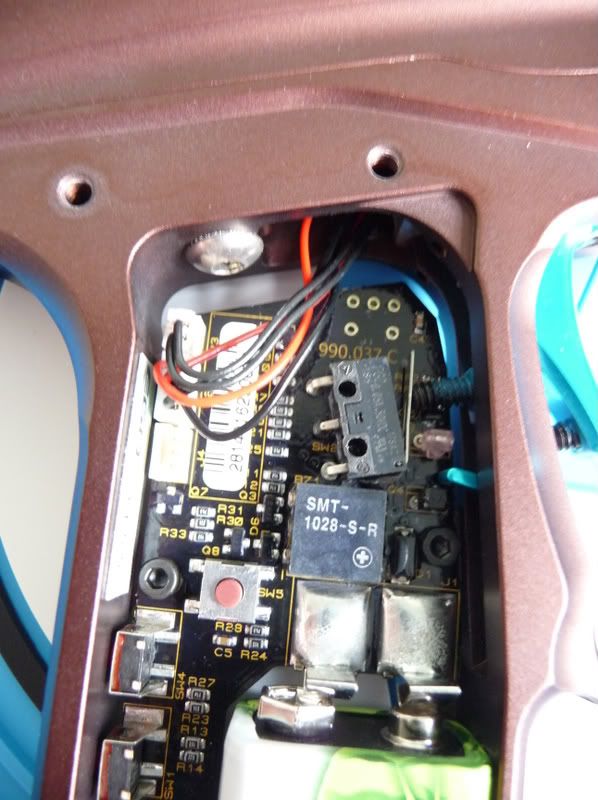
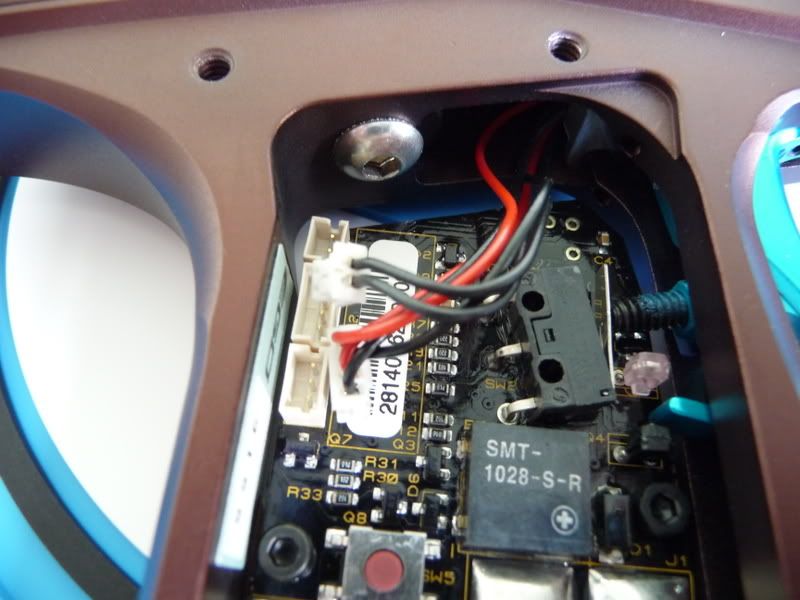
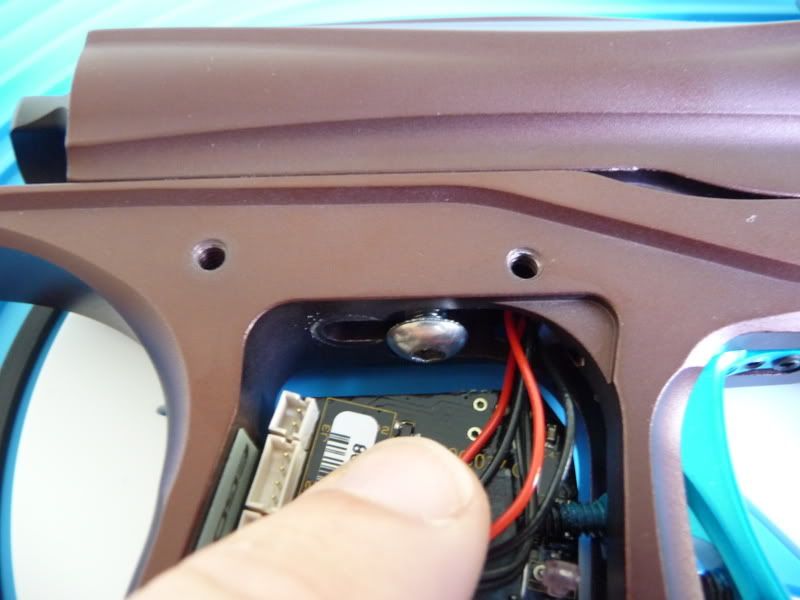
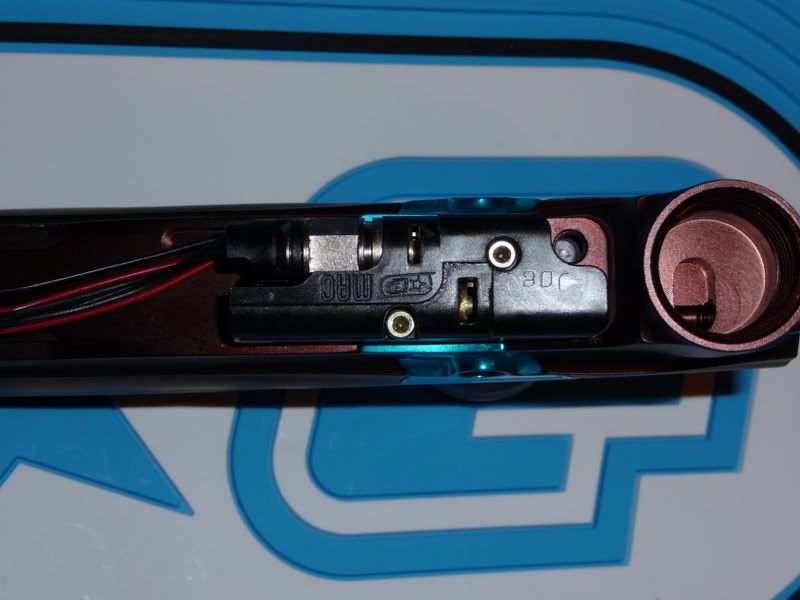
While we have the board exposed, it is worth quickly talking about the board.
Like the Egos, right from the '05 onwards, the Geo board features an LCD display, has three external control buttons, and a set up button on the board, which can only be accessed by removing the grips - it keeps the board tournament legal.
Towards the end of 2006, the Ego Maniac board was released, as a test bed for features that would be used on the Ego7. These included programmable ramping, and an increased rate of fire cap at 25bps, an increased eye off rate of fire of 25bps, or eyes on rate of fire could be uncapped entirely.
When the Ego7 was released, it had the programmable ramping feature, though the eye off rate of fire was dropped back to 15bps, the capped rate of fire was increased to 30bps, and uncapped ramping remained. The board also features both optical and microswitch trigger activation - pre '07 Ego boards were optical only. Later versions of the Ego7 board also added connection points for an expansion board; this included a sound module and a dedicated auxiliary out port to power external devices such as RF chips.
The Ego8 board reversed the colouring of the LCD display (black on a white background) for clarity, and added an auxiliary out port on the board itself. It had the connectors for the expansion board, which was still required if you wanted the sound module. It also had handy indicators to show you if trigger pulls were being registered, with different icons to show if it was the microswitch or optical sensor that was registering the trigger pull.
Ego7 and Ego8 boards can also be set to allow all the set-up menu options to be accessed from the external buttons, but this obviously isn't tournament legal. This feature is carried over the the Ego9 and Geo boards.
With the Geo (and Ego9) boards, things have moved on a little further. The Geo has all the features of the Ego7 and Ego8 board, complete with the auxiliary out port, reversed LCD and trigger monitors. It also now has a built in sound module, so there are no longer any connectors for the expansion board.
One change that is Geo specific, is that the max rate of fire cap is now 22bps. With the higher air volume requirement of a spool valve, there was a concern that people could run in to shoot down, so this rate of fire was chosen in order to prevent that ever becoming an issue. The marker can actually cycle much faster than that, faster even than an Ego9 apparently, but what is the point if your velocity isn't stable. However, for those that must try, the board can still be uncapped.
Tests have been carried out with higher flowing regulators, but it was found that some of these spiked when first gassed up, and there was a risk of damaging your solenoid, so Eclipse stuck with the reg design they had, and capped the board lower to prevent shoot down.
*****
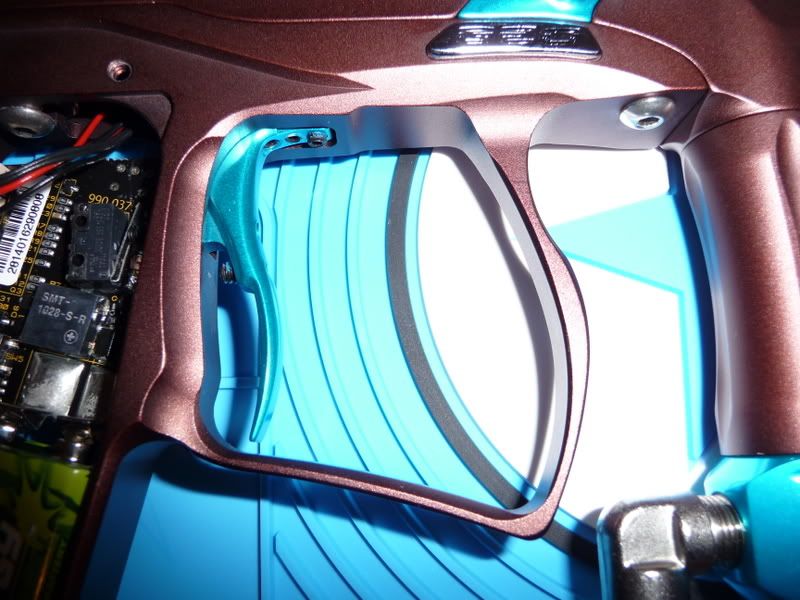
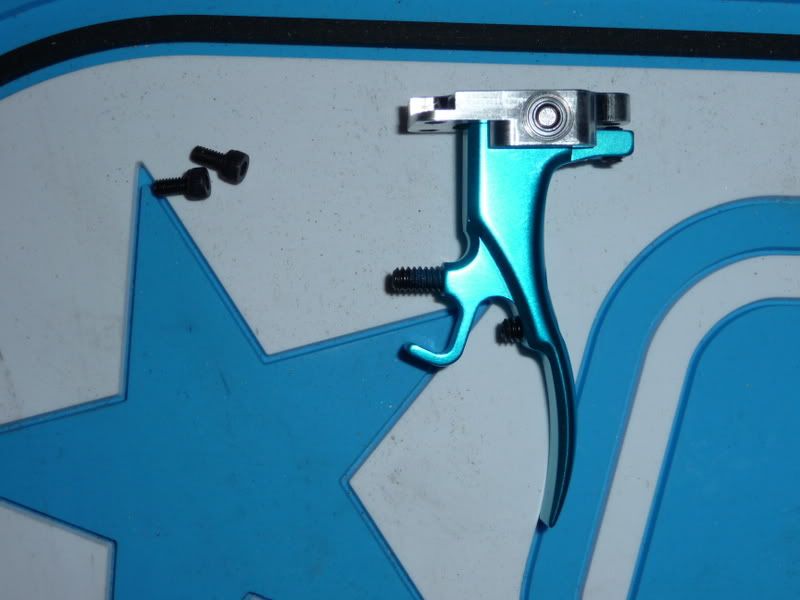
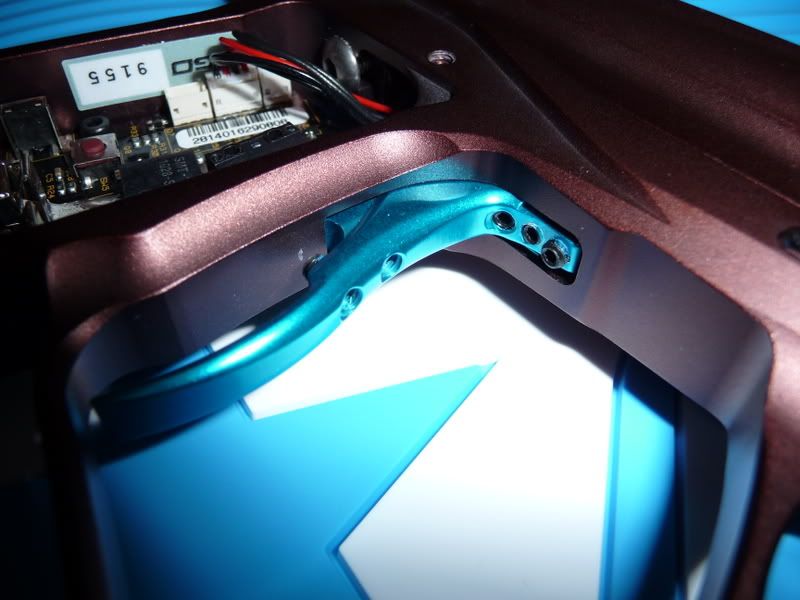
Another couple of things to mention while we are in the vicinity of the frame is the trigger and trigger guard.
The trigger guard is something of a sticking point visually, with people either loving or hating it. It gives a lot of space inside the guard in front of your fingers for walking, and sweeps down at an angle, giving both some space in the guard for three fingers, but also ample space below the guard for the unused fingers of those who only want one or two fingers on the trigger. The top of the guard, at the front, is also cut away in a curve to give space for your thumb if you like to wrap your leading hand around your regulator.
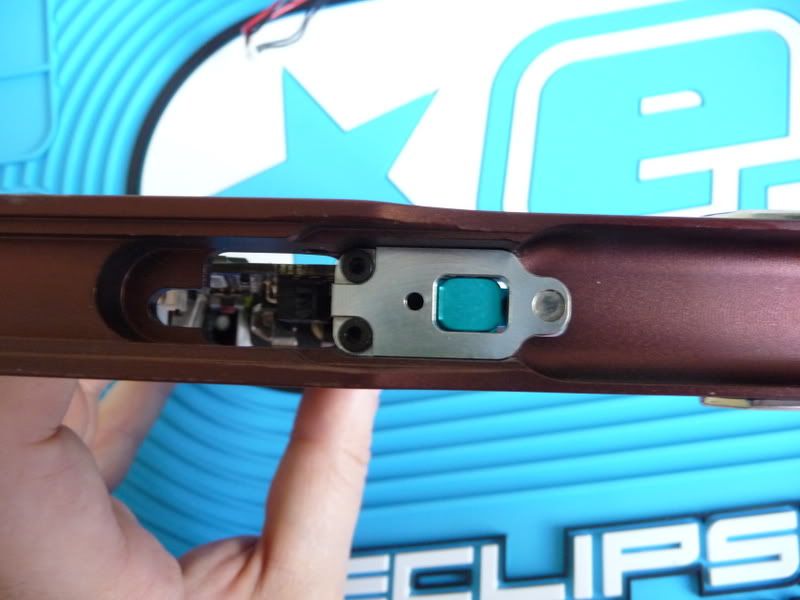
The trigger is installed in a similar fashion to the Ego7 and Ego8 triggers, but just as the bearing carriers in the Ego7 and Ego8 are different to each other, so the Geo and Ego9 bearing carriers are different (and different to each other I hasten to add).
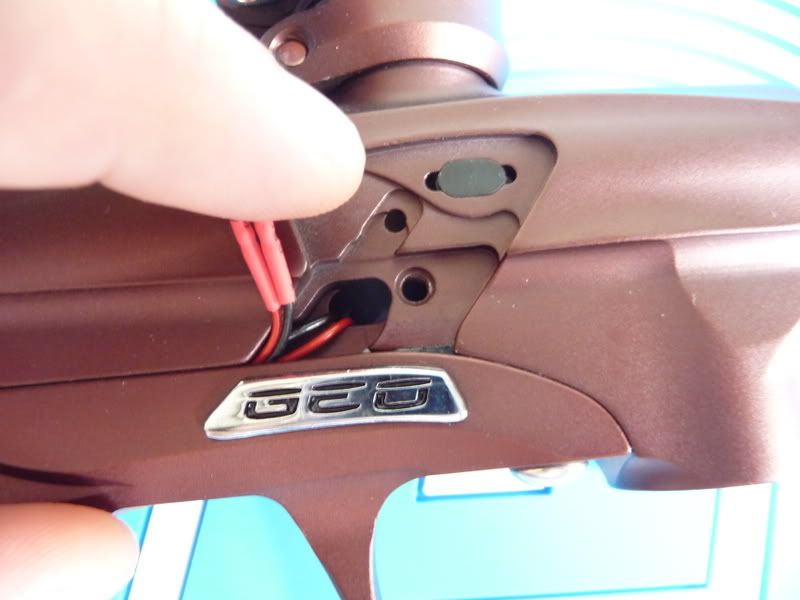
The bearing carrier now features an adjustable spring return. The spring is mounted above the rear of the trigger, with the spring pushing down on the trigger. The spring sits on top of a screw which can be adjusted up and down to change the spring tension. The screw is reached through the small hole in the bearing carrier: -
Removing the two screws at the rear of the bearing carrier allows the carrier and trigger to be lifted out of the frame - be careful to ensure that the trigger spur clears the optiswitch sensor before you lift the trigger out.
The front face of the trigger has five screws: -
The screw in the middle is the pivot pin lock screw - the new bearing carrier blocks access to the pivot pin, so this screw is no longer accessed from inside the frame.
There are two screws on the top of the trigger; as is normal for the Ego markers, the screw closest to the pivot pin is the front stop screw, and the one furthest from it adjusts the magnetic return force.
There are two further screws through the face of the trigger, with the one closest to the pivot pin being the microswitch activation adjustment screw, and the one furthest away being the rear trigger stop. Optical trigger activation is still carried out by a fixed spur on the back of the trigger.
*****
Back to the frame - disconnect the wires from the board.
Loosen the rear frame screw, which is inside the frame with the board.
You can then remove the front frame screw.
This allows the frame to then slide back to clear the rear frame screw, which stays attached to the body.
The body can then be lifted off of the frame, being careful that the wires don't catch on anything.
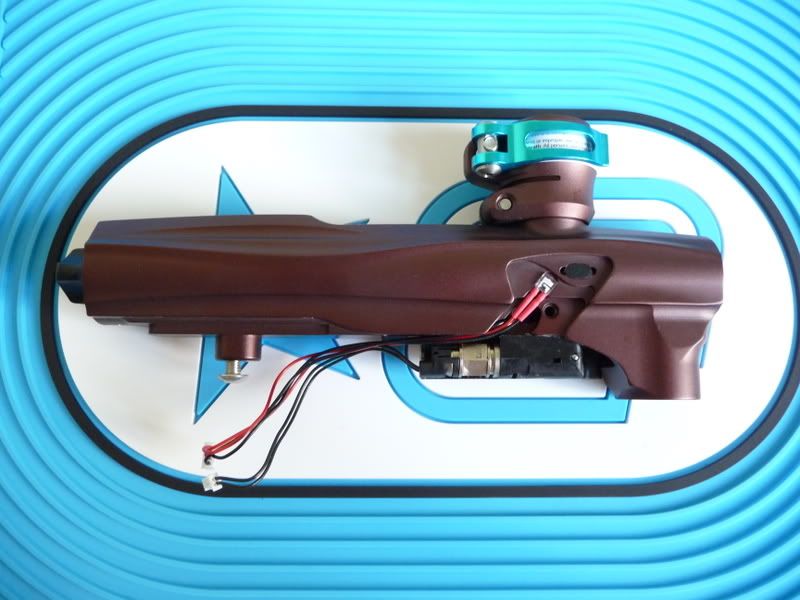
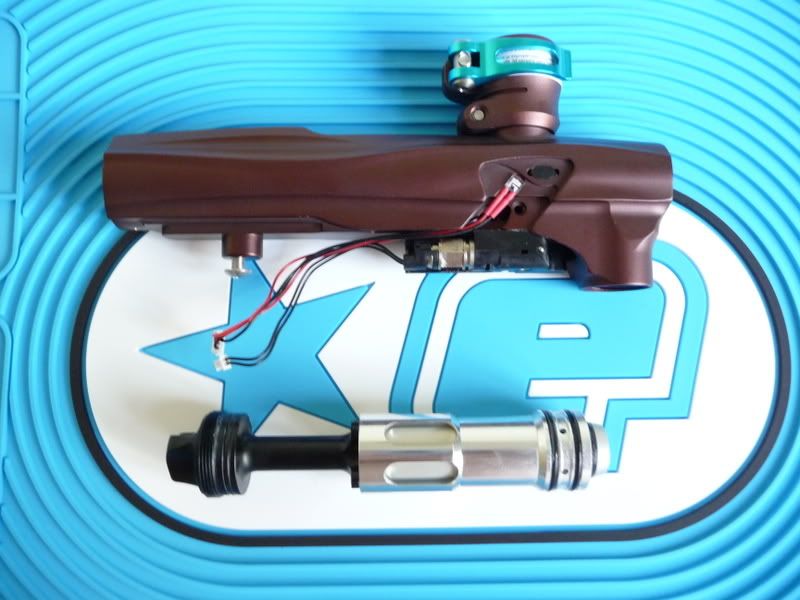
With the frame removed, you are left with the body, with the bolt kit inside, and the solenoid attached underneath.
You can see that the rear frame screw is still attached to the body.
*****
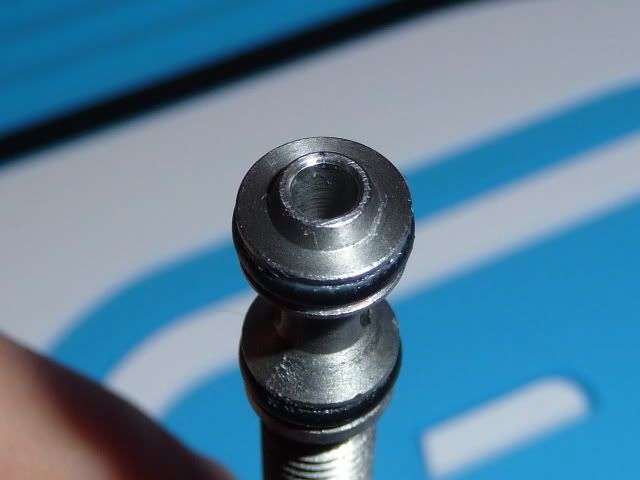
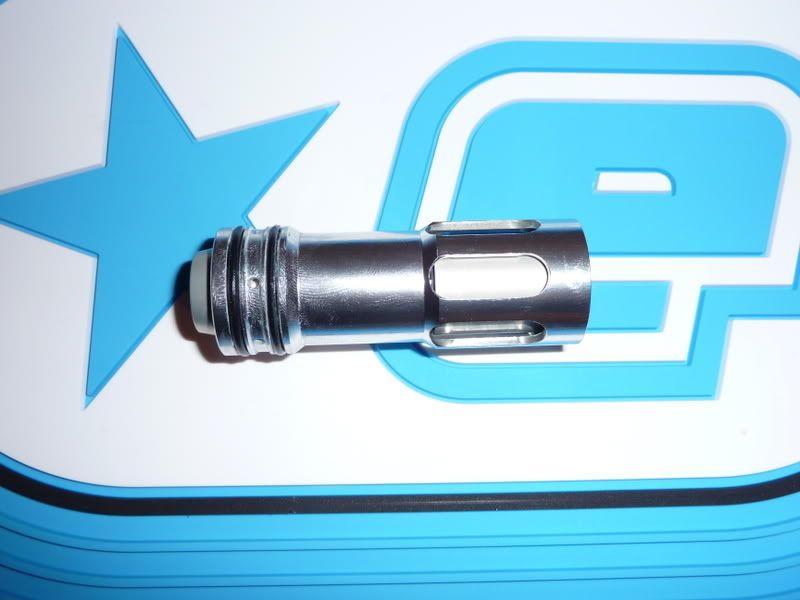
We can now remove the bolt kit.
This can be easily be done by unscrewing the "Prop Shaft" by hand. It doesn't need to be more than hand tight, but the Prop may come loose under the vibration of firing, so keep an eye on it.
Last edited by Uziel Gal : 09-05-2009 at 08:01 AM.
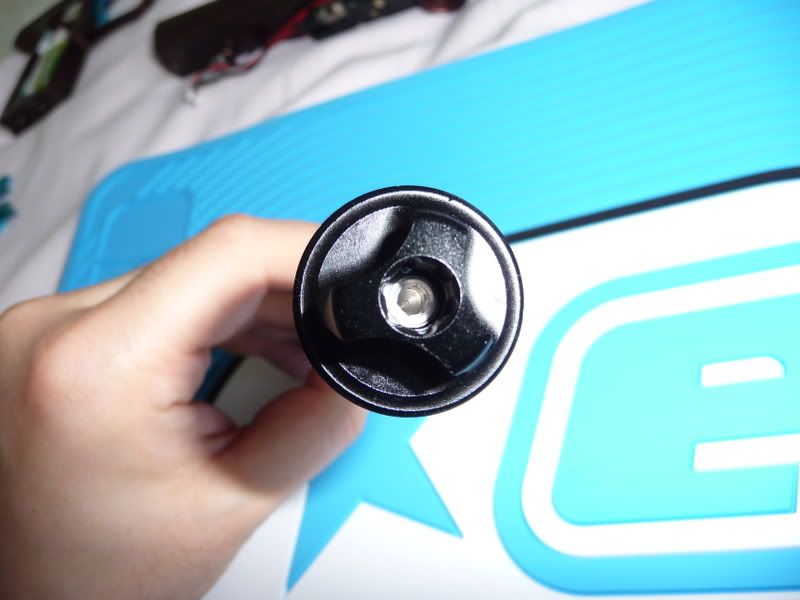
Alternatively, the back of the Prop does have a hex hole for an allen key, so you can tighten it with that if you like. That'll stop it shooting loose, but also mean that you will need the allen key again to remove it. Your choice.
The screw in the middle is the VVC (variable volume chamber) adjuster,which I will explain later.
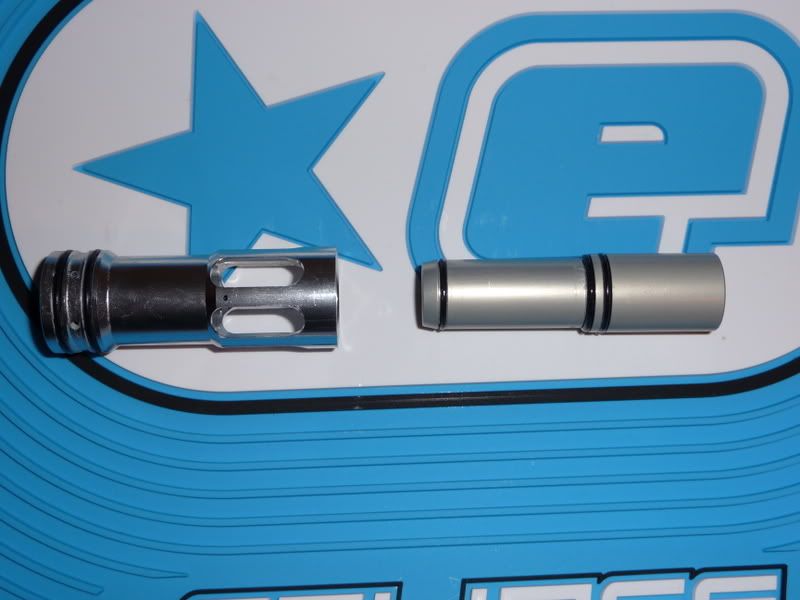
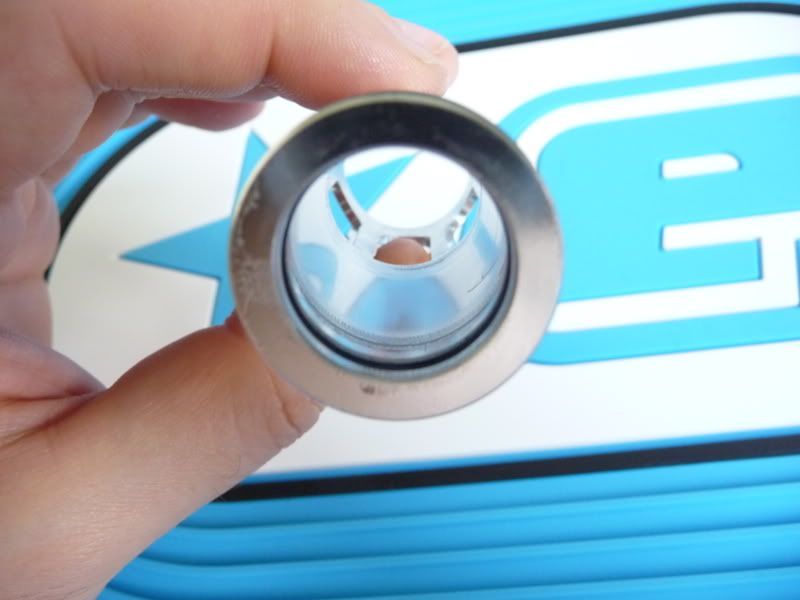
You can then reach into the back of the marker and pull out the bolt - the firing can will come out with it. The Geo I have now, these parts slide out easily - the one I learnt on at Planet, I had to use a fluffy swab to push them out through the front of the marker. As long as you don't use anything that is going to scratch up the inside of the marker, it's all good.
The bolt can then be pushed out of the firing can from the front - no need to remove the o-ring on the front of the bolt.
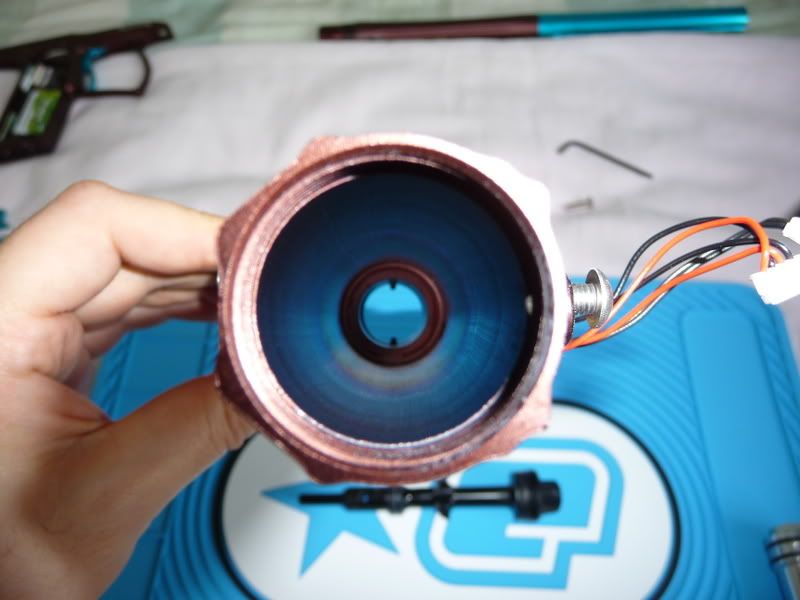
You now have a basically empty tube: -
*****
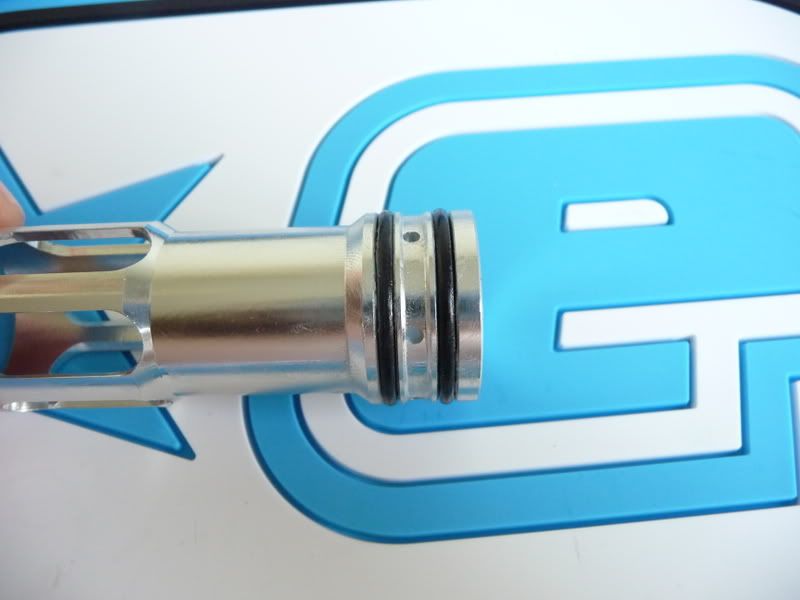
To reassemble, you should first clean the old grease off the bolt kit components, inside and out.
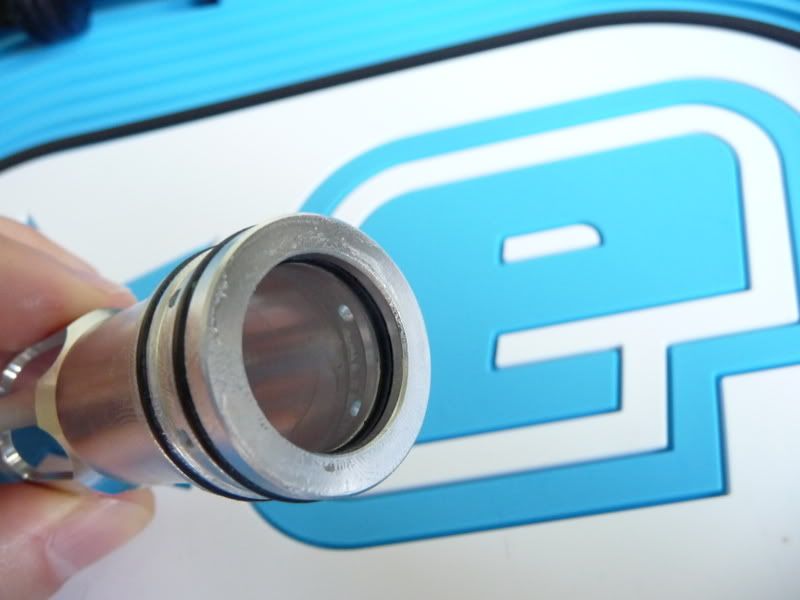
New grease should be applied to the two o-rings on the front of the can, the o-ring on the inside of the can, and the front internal cylinder of the can: -
Tech Tip #5 - if air is leaking down your barrel, the internal can o-ring, or front external can o-ring may be leaking. Clean and grease them, or replace if necessary.
Tech Tip #6 - if your marker won't cycle correctly, and everything else appears to be functioning normally, air in the firing chamber may be leaking passed the rear external can o-ring and venting out of the solenoid - clean and re-grease, or replace if necessary.
The bolt should be greased from behind the front o-ring (this does not require greasing) up to and including the back o-ring. The back of the bolt does not require grease. The large, rear internal bore of the bolt should also be lightly greased.
Tech Tip #7 - if your marker won't cycle correctly, air may be leaking passed the rear bolt o-ring - clean, grease or replace as necessary.
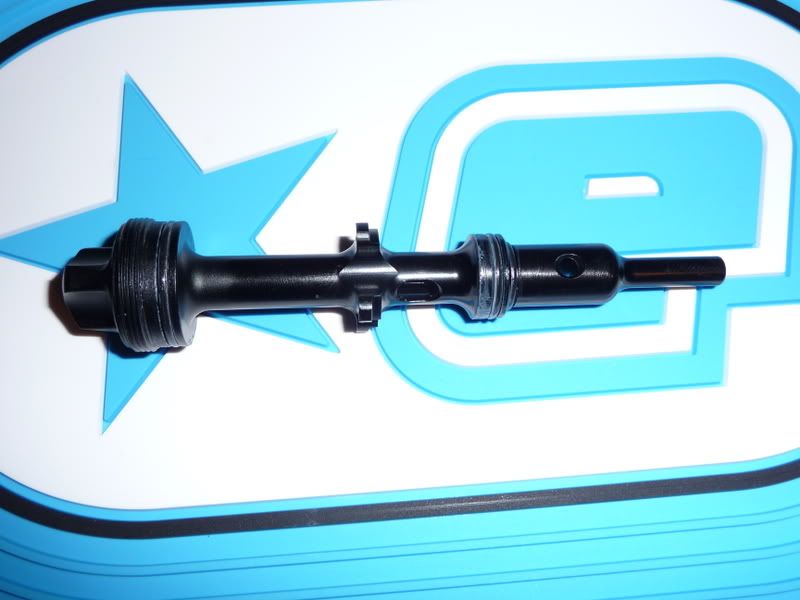
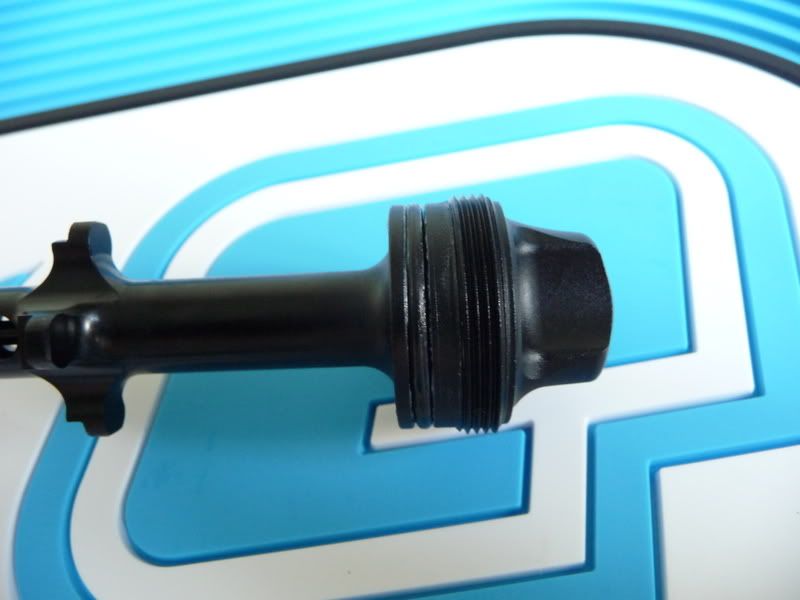
Finally, take the prop shaft, and grease the large o-ring and threads at the rear. Then grease the Prop Shaft's middle o-ring.
Tech Tip #8 - the large o-ring on the prop shaft seals the rear of the marker. If you have a leak around the back of the Prop Shaft, this o-ring is at fault.
Tech Tip #9 - an air leak down the barrel may be down to the Prop Shaft's middle o-ring leaking.
Push the bolt in to the can: -
Place the Prop Shaft in to the back: -
The whole bolt kit can then be gently pushed in to the back of the Geo body, and the Prop Shaft screwed in.
Tech Tip #10 - if your marker isn't feeding cleanly, leading to chops, and there is no other reason for the occurrence, your Prop Shaft may need to be serviced by an Eclipse tech.
*****
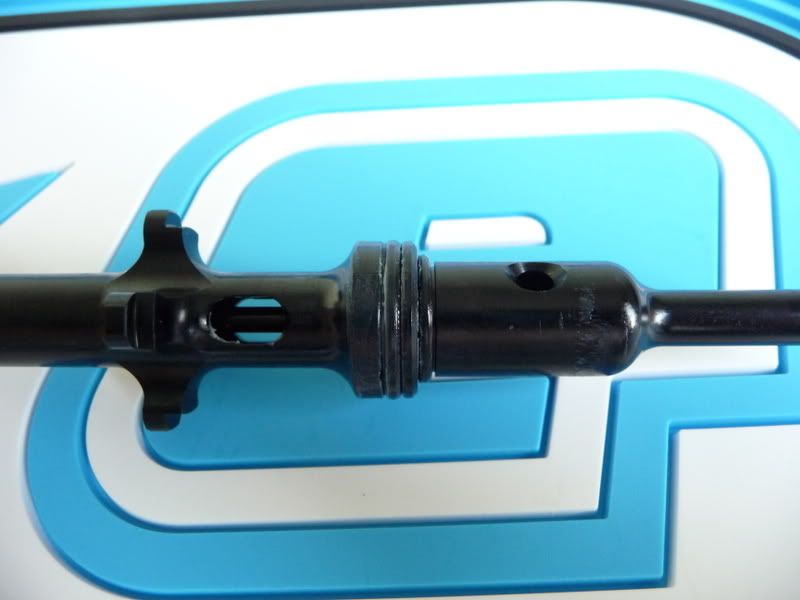
Just a brief look at the variable volume chamber. This is adjusted by a screw at the rear of the Prop Shaft: -
The Prop Shaft is hollow, and stores additional air, over and above what is in the firing chamber. Adjusting the screw moves a piston up or down the hollow bore of the Prop Shaft, adjusting the volume that is available for air to be stored in. This gives you a small degree of adjustment over the Geo's operating pressure.
Tech Tip #11 - if you have a leak around the VVC adjustment screw, and the screw is backed all the way out, try screwing it in a 1/4 turn. If this does not resolve the problem, your Prop Shaft should be taken to an Eclipse tech to be fixed.
*****
Last edited by Uziel Gal : 09-05-2009 at 08:02 AM.
OK, finally found the time to add a little more to this.
*****
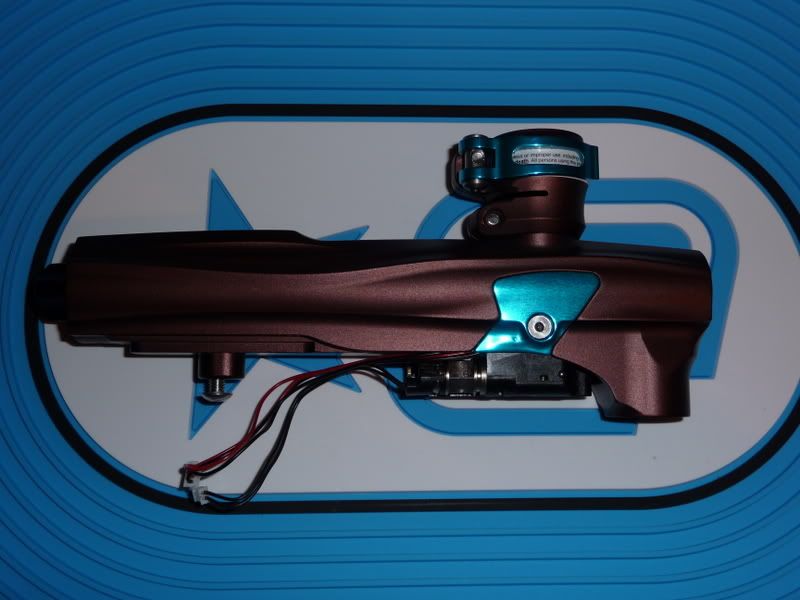
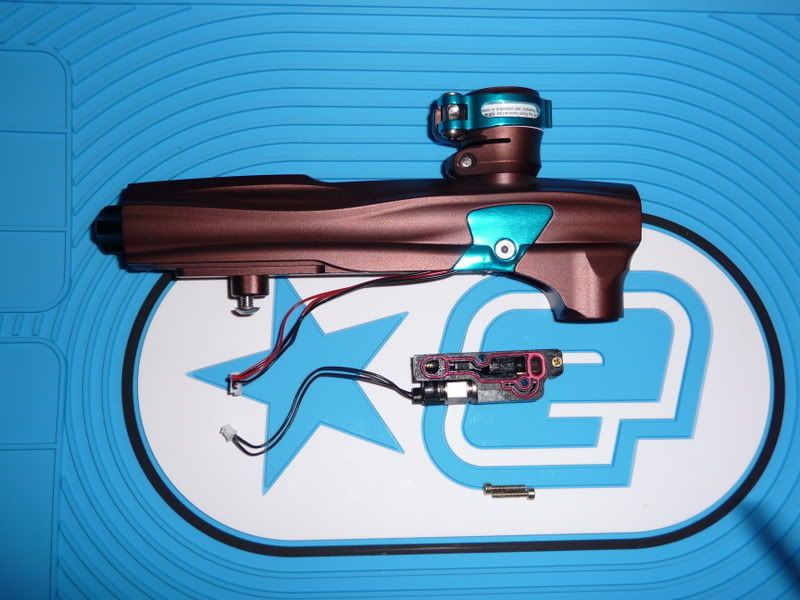
Let's start with just the body and the solenoid: -
There are two screws under the solenoid that need to be removed in order to detach the solenoid from the marker body: -
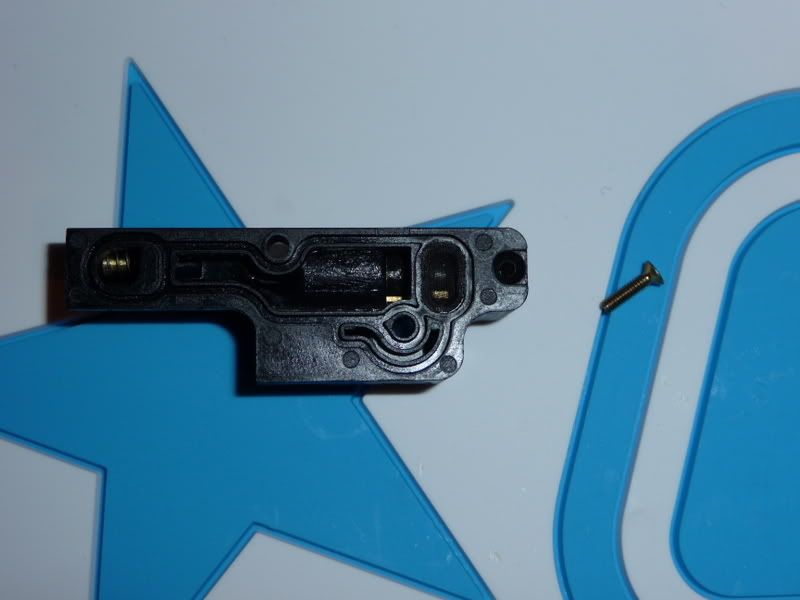
Here is what the bottom of the marker looks like with the solenoid removed: -
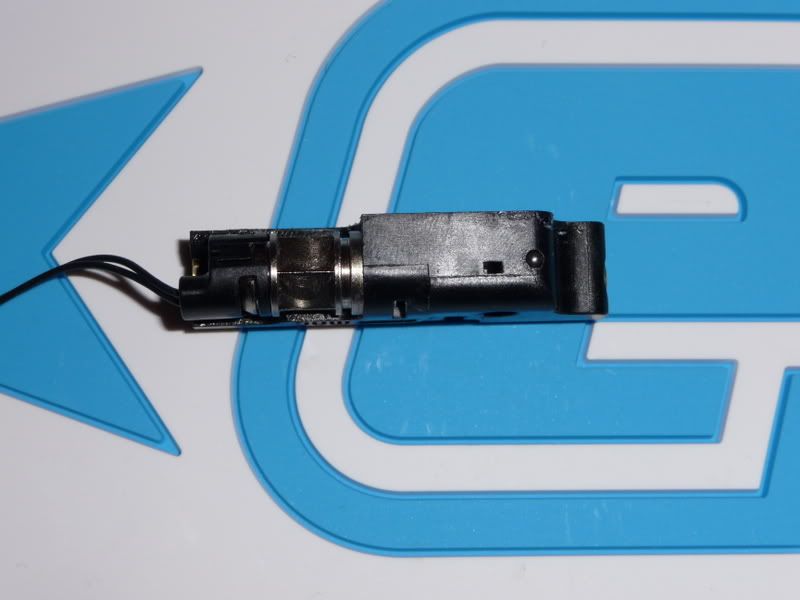
Here is the solenoid from the side, and from the top: -
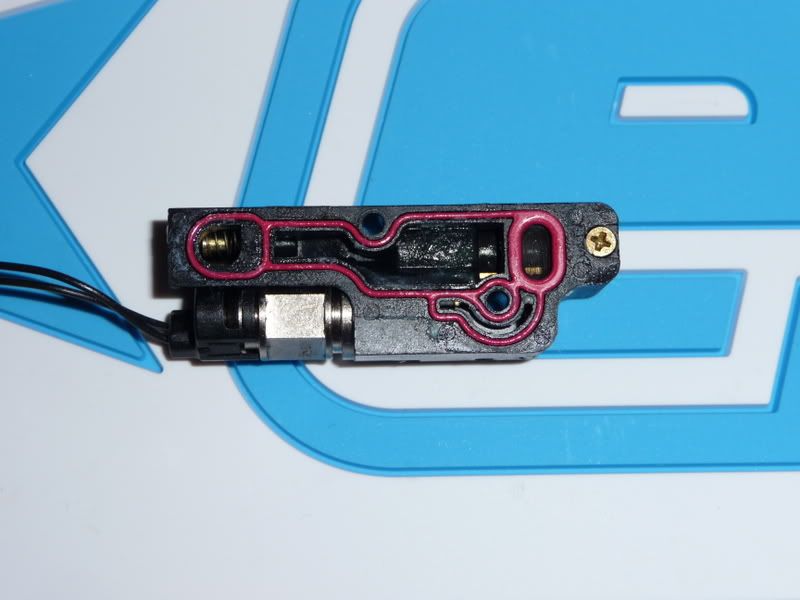
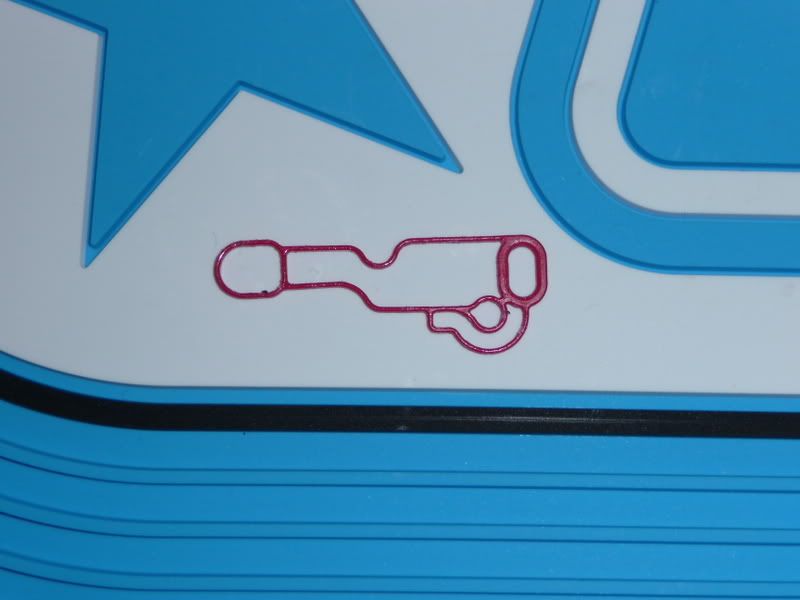
First thing we can do is remove the gasket from the top of the solenoid: -
When re-assebling, the gasket should be cleaned and greased.
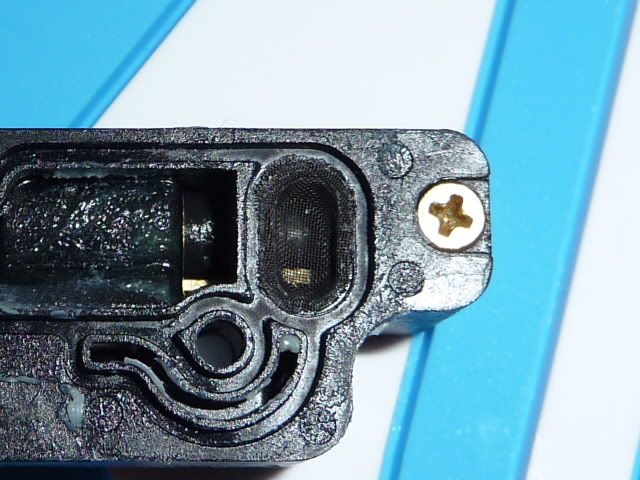
There is a filter at the front, catching any debris before it enters the solenoid: -
This can be removed for cleaning.
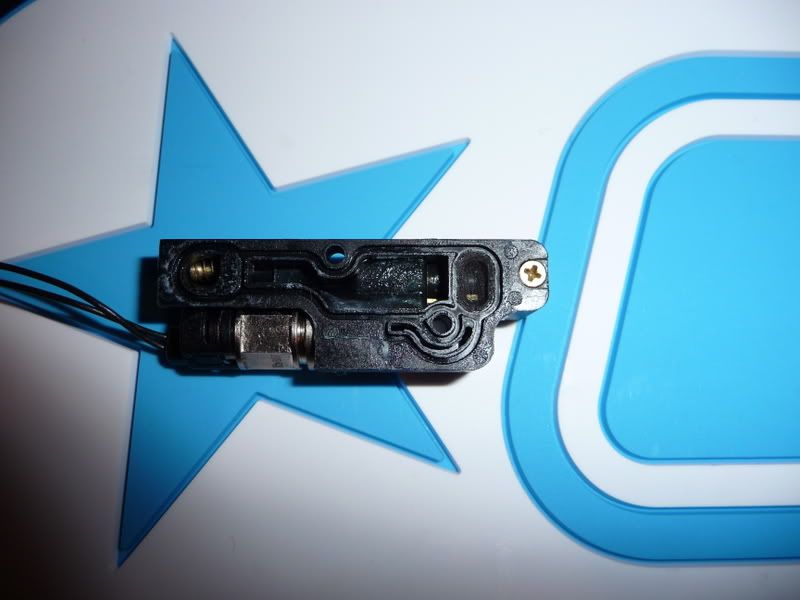
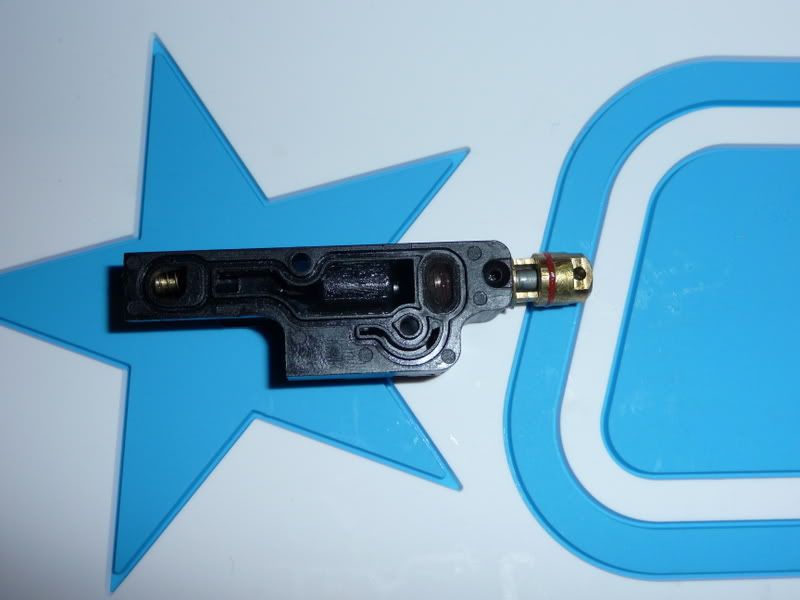
The solenoid pilot assembly is found on the back right of the solenoid housing, and can be unscrewed from it.
This is the part of the solenoid that is energized when the trigger is pulled, shuttling a spool to direct air around the solenoid, which in turn allows the bolt to cycle forwards. This does not normally need to be removed unless you are replacing it.
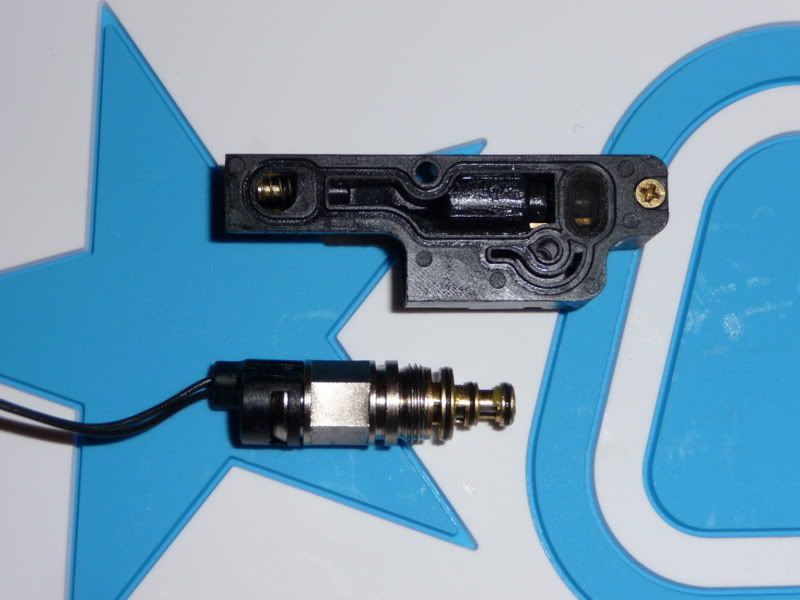
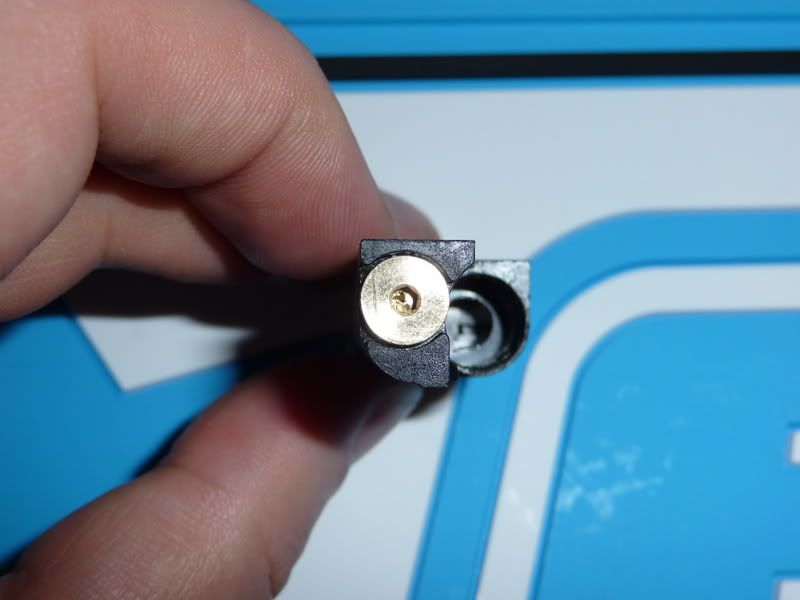
However, this is only the first of two spools inside the Geo solenoid. The second is a sprung, pressure controlled spool, found at the front left of the solenoid (on the right in this picture, as I have turned the solenoid around): -
This is accessed by removing the screw at the front of the solenoid: -
This spool should be cleaned and re-greased, and the chamber that the spool fits in should also be cleaned, with a Q-tip.
When air pressure builds in the solenoid after a cycle has been completed, the second spool is pushed backwards by the air pressure against it's spring. When the pilot is energized, and the marker fires, air pressure in the solenoid is vented. The drop in pressure then allows the spring in the second spool to push it out again. In essence, though only one is attached to the solenoid pilot, it is controlling two spools.
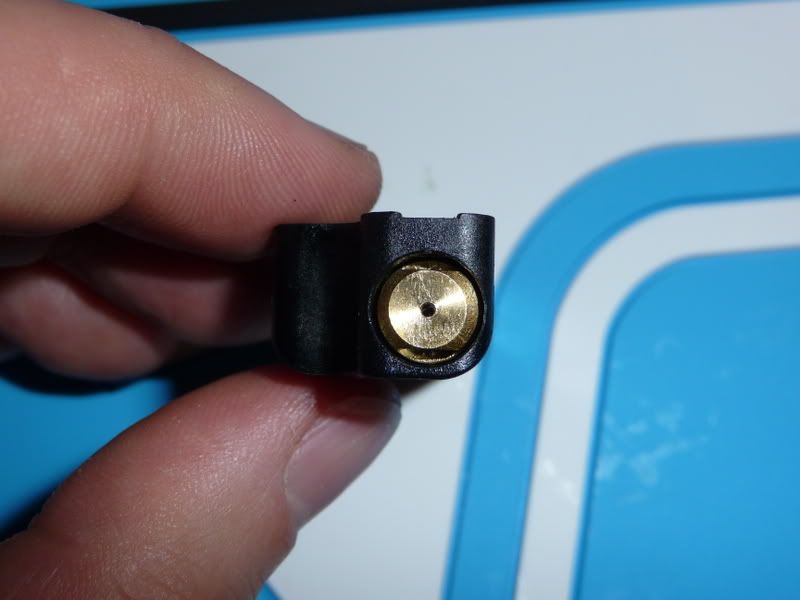
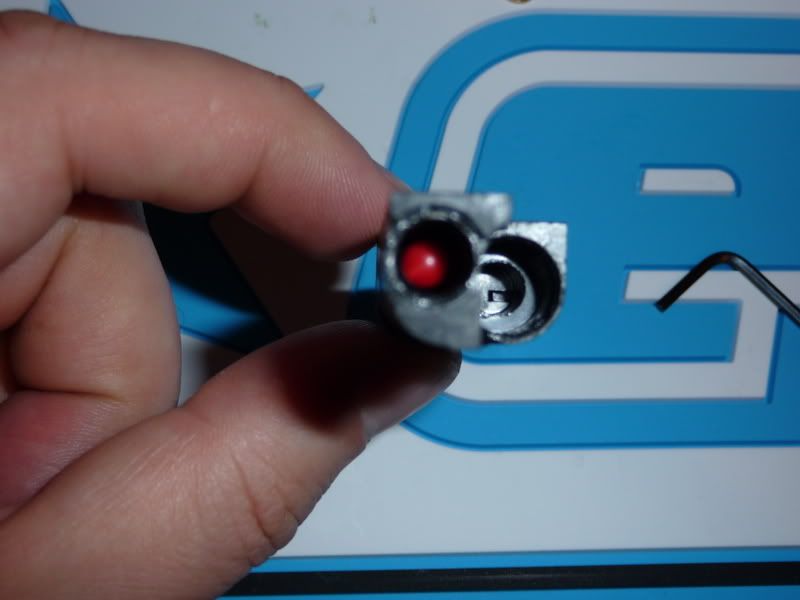
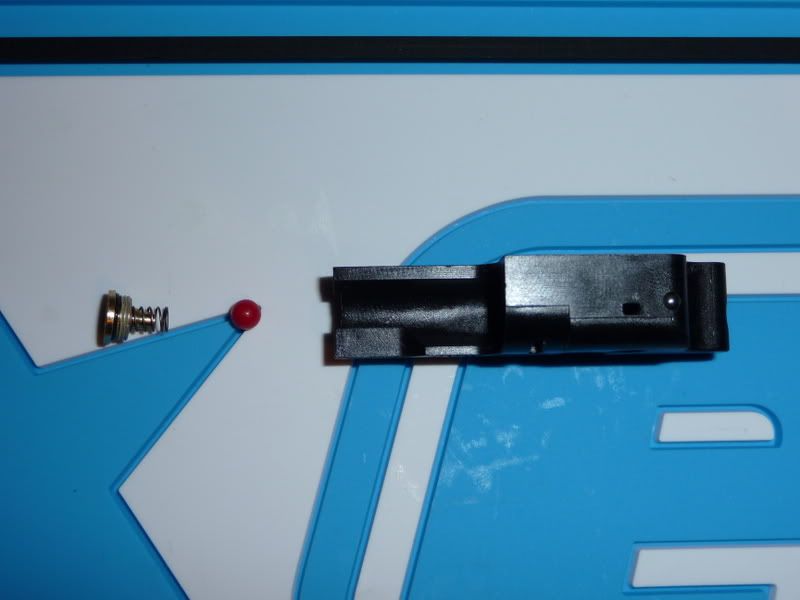
The next item to look at is on the back left of the solenoid - the back check valve: -
Unscrewing the bolt reveals a spring loaded ball: -
The purpose of the back check valve is as follows: -
When air is entering the solenoid, it can push passed the ball, depressing the spring. This allows air to flow through the solenoid, up in to the marker, where it will fill the firing chamber of the bolt kit. At the same time, air is filling the front of the bolt kit, which holds the bolt to the rear.
When the marker is fired, the solenoid switches, and air starts to vent from the front of the bolt kit, out through the solenoid.
The air in the firing chamber also wants to exit, and if the back check valve were not present, it would also vent out of the solenoid. However, air from the firing chamber trying to rush back down in to the solenoid pushes the back check valve closed, so it cannot vent out of the solenoid. Instead, it has to push the bolt forwards - which it can now do with the pressure in front of the bolt having been removed - which causes the marker to fire.
Tech Tip #12 - If after servicing the solenoid, your marker will not fire correctly, make sure that the back check valve has been assembled correctly.
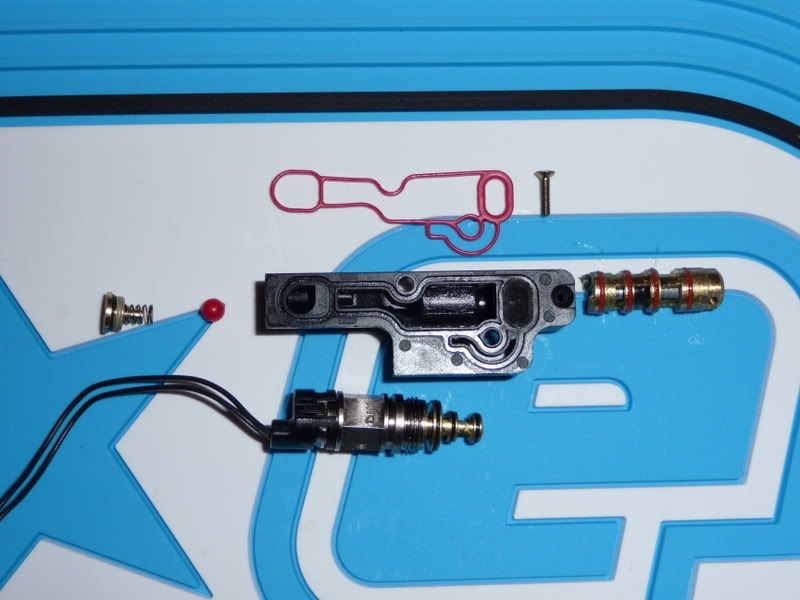
Here are all the parts laid out in relation to their positions within the solenoid: -
Tech Tip #13 - when screwing the solenoid back in place, the screws should be tightened down well - not excessively, but pretty tight, otherwise the gasket can be pushed out from between the body of the marker and the solenoid.
Last edited by Uziel Gal : 11-09-2008 at 07:09 PM.
Very nice, Steve. The trip wasn't a completely wasted journey I see
Looking forward to the next installation. Reading through that, it made me think that a flow-chart for leaks and cycling issues might be a good idea.......
Quote:
Originally Posted by Uziel Gal
Robert made sure that it wasn't a wasted trip!
I'm sorry I couldn't stay longer (both to yourself and to myself - lots to learn!), but skipping out early turned out to be the right thing to do - 4 hours to get to you, but took over six to get back.
I'm tempted to say that there is something akin to a leak flow chart in the back of the manual, but then, so is most of what I posted here (along with more info on the solenoid), so that's kind of a hollow argument.....
Quote:
Originally Posted by garticus
....that would be a great idea for the un-techno heads out there.
Mr Gal, excellent post with superb pics
Quote:
Originally Posted by Paint_hore
sweet, Im now a certified tech.
Quote:
Originally Posted by 96 Ls lnteg
seriously that how I felt after reading it
Quote:
Originally Posted by Nicky T
Great thread SW
Pleased that you enjoyed your visit to Eclipse and that you got to meet some of the faces behind the screen names
Quote:
Originally Posted by Uziel Gal
I must admit, I struggled to recognise Robert at first - previously, I've only ever seen pictures of him wearing a lab coat!
Robert in "civvies"? It's just not right!
Quote:
Originally Posted by coyut
very cool thread !
Quote:
Originally Posted by rakim
Why lube the o-ring on the back of the Prop Shaft? Wouldn't it be better for the people who are having problems with it backing out to not lube it? I'm not flaming, just asking.
And I'm guessing that the thing you weren't allowed to take photos of was an SL Ego
Quote:
Originally Posted by Uziel Gal
No, the thing I wasn't allowed to take photos of was the Rockstar Ego9 and Geo, which have now been made public.
You grease the rear o-ring to reduce wear and tear on the o-ring and to help maintain a seal. That o-ring keeps the air sealed inside your marker.
Would it be possible for you to insert new pictures in the respective areas showing where and how much to lube the parts like the HPR, noid gasket, check ball, can/bolt/prop shaft?
I think that is all this thing lacks!!! I founf it tremendously helpful when tearing mine down for the first time, yet when putting back together I was unsure of just how much lube to use as I have heard repeatedly you need LIGHT lube, but the degree of "light" is subjective at best.
Indeed, "light" is somewhat vague and non-specific!
Having said that, anything I say is only going to be my own interpretation, and what works for me with my marker and my settings.
Your best bet may be to follow the official maintenance guide, which is coming up: -
If having done that, you still feel that the bolt is sluggish, and dragging, then just wipe a little off, and then spread the rest around, and try again.
"Light" means it should look greasy but not white. When we did the Geo training this is how we were told to do it, and it works very well. I even did it for someone with a horribly sticky DM4 and it helped him as well.
As a bonus, it freaks the owners of other spoolies with thick gobs of lube out when they see you have "no lube!" in your marker. That alone makes it worth it for me
Video is good, BUT you just can NOT see how light it really is....a few added pics of correct lube level to bolt, reg and noid gasket would be awesome!
TECH TIP: I learned this last night after services my Geo after 2 cases of paint over the weekend.
When lubing the can O-rings, when Jack says VERY light, he aint kidding. I wiped some grease on there, put can and everything back in, air'd up and it leaked. Wiped it down with a rag, no leak! I had the grease so ligtht it wasnt even in the oring groove!
Just a little something I learned that might help anyone having leak problems, first things first: wipe all the grease off!
I have had to strike a balance, initially my setup started out too dry and it leaked a bunch so I greased the hell out of it only to find the leak still present...finally after establishing some middle ground it stopped, it's a very tempermental thing the Geo bolt but after you find the right amount of Grease it works like a charm.


 ), and this time, I was allowed behind the scenes.....

 ), so there should be no chance of your ball clipping the end of the barrel front, or rolling along the barrel front and picking up a spin.
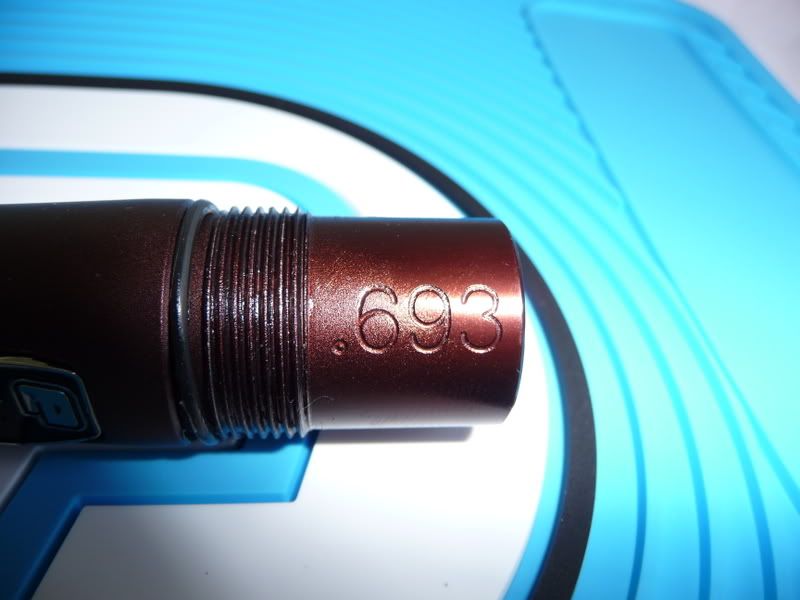


 in your marker. That alone makes it worth it for me


 Your Privacy Choices