 |
 11-21-2003, 09:20 AM
|
#1
|
|
InvertedPB Owner
Join Date: Sep 2002
Location: NOR*CAL (916)
|
How To- Home Anodizing
There are several methods of producing the anodised finish, all differ a little in the chemistry used to achieve the porous/non-porous oxide layer. All use noxious chemicals (it's just that some are more noxious than others!). The method listed below involves the use of some fairly powerful reagents so in all cases wear eye-protection (goggles etc.,) and rubber gloves. There is no danger provided you are careful and handle the chemicals with respect - keep the containers covered and make sure youngsters can't accidentally knock them over. There is nothing particularly difficult about this process, and having ironed out the practical bugs the biggest problem became how to deal with the larger parts. I reckon the best shape of tank is long and narrow (say, 18 inches long by 3 inches wide, and perhaps 6 inches deep).
You will need the following items:
* A plastic, glass or lead tank to hold the acid bath (all tanks need to be of a size to hold your largest part).
* A few plastic or glass tanks to hold the dye bath.
* A plastic or glass tank to hold the etching solution.
* A container (Ceramic is the best) in which you can boil the parts in water.
* Lengths of pure aluminium rod to suspend the parts in the acid bath (aluminium welding rods are good) (And aluminum wire is good,but hard to find)
* GP Plates form Caswell Inc (These are the best money can buy,cheap too!).
* 12V DC power supply (Battery charger or car battery is OK (2 are even better - see below)
* Set of leads and crocodile clips ( < The Best choice) to make the electrical connections (make sure they are rated for at least 20 Amps, auto jump leads are great for really heavy currents)
* Protective clothing (latex gloves, goggles, apron).
* Somewhere to work! - preferably with a stainless steel sink close by. And somehwere you can mess up.
The chemicals you will need are:
* Battery Acid (Can be obtained from Napa Auto Parts)
* Sodium suphate (30 grams per litre of acid solution)
* Sodium hydroxide (lye) at about 10%-20% w/v.
* Dyes from Caswell Inc (Lots of Colors).
DYES:
The dye is the critical component for coloured finishes. If you are not fussy about exact colour matching then several vegetable-based clothes dyes can be used, I've also had some success with diluted writing inks. The toughest colour to achieve is a truely dense black. Black vegetable dyes produce a gold/brown colour, black inks only produce a dark blue colouration at best. If you get the dyes from caswell youll haveve no problem!
REAGENTS:
The acid bath contains 10-25% (V/V) sulphuric acid. Recently, I've been having good success with 10% acid so there probably isn't much need to to higher concentrations. Maybe the 25% will speed the operation up but 25% sulphuric acid is fairly nasty stuff to have lying around in any quantity. A recipe I saw suggested adding about 30 grams/litre of sodium sulphate to the acid bath, but I've had good results without it. If diluting from full-strength (concentrated) acid then you MUST add the acid slowly to the full volume of water, mixing all the time. This is a highly exothermic reaction and the solution will become hot. Never start by adding the water to the full volume of concentrated acid or it may become so hot at first that it may boil and spit acid at you! Sodium hydroxide is available in pellet form, simply dissolve in water to give the 10-20% solution (again, the solution will get quite warm as the pellets dissolve). The active component of many drain cleaners is also sodium hydroxide and will perhaps do as well. Keep the acid and alkali baths well separated! Always wear rubber gloves for all processes to avoid skin contact - including the dye which, if using a histological stain, is particularly difficult to remove.
APPARATUS:
The tanks should be filled to about 2/3 capacity with the relevant solutions. The acid bath requires 2 electrical connections, one is the anode (positive) side which goes to the workpiece to be anodised, the other is to an aluminium plate immersed in the acid which acts as the cathode (negative) terminal. I used some 2" x 1/8" aluminium strip, bent to shape such that it passed down one side of the tank, across the bottom and up the other side. If you are using a lead-lined tank then the lead itself will provide a good cathode. Nothing other than lead or aluminium should be used in the tank. For power I used two 12V auto batteries (55 AHr each) which could be connected either in series (to give 24V) or in parallel to provide high current at 12V Or a battery charger with Alligator clips. Deep-cycle lead-acid batteries would be better as these are designed to run from fully charged to nearly discharged, ordinary auto batteries should never be allowed to fully discharge. A real problem is to maintain a good electrical contact from the anode to the workpiece. If the part has a tapped hole, then I found the best way was to squeeze the end of the aluminium welding rod (about 3/32" diameter) in the vice to form a spade end, this could then be screwed into the tapped hole. Other than that, the workpiece has to be wrapped tightly with the wire. The problem is that as the oxide layer forms it is possible (if not likely) for it to interfere with the electrical contact - I found that a good initial contact sometimes degraded until little current was being passed. Obviously, take care the workpiece does *not* touch any part of the cathode plate in the tank or it will short the battery.
PREPARATION:
The workpiece to be anodised needs to be clean and completely grease-free. Any fabricated components need to be dismantled, otherwise acid will tend to get trapped in recesses and will cause corrosion at a future date. You can either thoroughly clean the part with a de-greasing agent (alcohol, acetone, SP Degreaser from Caswell etc.,) or if the workpiece is freshly machined it can be anodised right away (avoid touching it with the hands). I generally use the sodium hydroxide bath to both clean and etch the surface, 30 mins in the bath will produce a semi-matt finish, 5mins will leave a shiney finish. However, leave it too long and the whole thing might dissolve. Wash under the tap before placing in the acid bath. To form the oxide layer will require about 1.5Amps per 3-1/2 square inches of surface area. So, a large-ish part 6 inches square would need about 20 Amps - a high current!! Think about that before dunking your engine block in a big tank! Note: the process works best at lower temperatures, 'hard' anodising is done at 3 deg C. Putting 20 Amps or so through the bath tends to heat it considerably.
ANODIZING:
OK., you have the part suspended in the acid bath using aluminium wire, and the cathode is connected to the negative terminal of the battery. I use no current control, and a part of any given size will draw a current as indicated above. There will be (should be) fine bubbles released from the cathode during the process, and the workpiece will take on a milky-grey appearance as the oxide layer forms. It will take 70 minutes to form a layer of the correct thickness for black dying, about half that for a decorative coloured finish.
IMPORTANT NOTE: If the part has an etched or otherwise rough/matted finish then the effective surface area may be UP TO TWICE that which you may have calculated from the gross overall dimensions. Take this into account when estimating the total time for the electrolytic formation of the oxide layer.
After the time is up it's merely necessary to remove the workpiece from the acid bath, rinse it under the tap to remove excess acid, and dunk it into the cold dye bath. Some sources suggest you might need to boil the dye bath but it works fine for me cold. Of course, you don't *have* to dye the anodised part - clear anodising still offers good protection from corrosion. Leave the part in the dye for about 15-30 minutes then hook it out and rinse it under the tap. The part should still retain the colour after the rinse (if not, something's gone seriously wrong somewhere - probably you lost the electrical connection part way through). After rinsing place the the part into a pan of boiling water for about 30 minutes to permanently seal the surface. Or use the sealing agent from Caswell Inc.
And that's it - you can add a little more protection to the finish by polishing with wax or lanolin.
Here are a few pictures of my setup...
~InvertedPB aka SilverLCDBushy


Last edited by SilverLCDBushy : 11-21-2003 at 09:22 AM.
|

|

|
 Sponsored Links
|
Remove Advertisement
|
|
Advertisement
|
|
|
01-04-2004, 12:33 AM
|
#2
|
|
corporate slave
Join Date: Jun 2001
Location: green river, WY
|
that system will work, but your thickness will not be very consistant.
hmm a little more info here (ive been doing it a long time, on motorcycle parts before pb)
anyway tapwater is a no no, use distilled water for everything.
for dying ano your ratio should be 50:50 water/acid
for hard surface ano you should be at 4:2
the temp range of the bath should stay a constant 72 degrees. that is the best temp for good oxide formation
amps required are .1-.15 per sq. inch
oxide film forms at the rate of .1 mil per 2-3 minutes ano time
rinsing after coming out of the acid bath should be done in a tank of distilled water mixed with baking soda to nutralize the acid.
sealing works best if done in a nickel acetate bath with a ph of 5-6 at a temp of 210 degrees F.
2-3 minutes per .1 mill coating thickness
racking or hanging is best done with titanium, as it is not affected by tha ano process and does not interfere with the anodizing
small amounts of free aluminum in the bath helps with dye absorption (nott like chunks of al, disolved al.)
about 10 g/l is the best.
for further study in plating/ anodizing i recomend reading
"The electroplater's handbook" by C.W.Ammen
and " aluminum and its finishings" (cant remember aurthors, i have it here somewhere.
__________________
www.NeuWerldExtreme.com
I SOLD OUT, oh well maybe i can get stuff done now....
if i speak at one constant volume, one constant pitch, one constant rhythm, right in to your ear, you STILL wont hear. (faith no more)
LONG LIVE THE SERVOS!!........
|
|
|
|
|
04-20-2005, 07:43 AM
|
#4
|
|
AKA Tech
Join Date: Jul 2003
Location: Florence, Ma
|
anybody thinking baout doing the be VERY careful and check with the epa on the cost of cleanup before you start
there are plating shops unintentionaly started because someone wanted to do a few parts and then could not afford to properly get rid of the waste products
there are shops that the owners DON'T WANT but cannot afford the cleanup costs involved in closing the doors
up until last friday I was a anodizer for the last five years of my life, then I came to my senses
Alan
DC
__________________
For all your AKA Viking and Excalibur parts, service, and milling please visit http://destructivecustoms.com Email destructivecustoms@yahoo.com
The only Certified AKA repair center.
Looking for 03 or 04 Excals or Vikings or just umilled body. Will do a trade for milling or parts.
Wanted all below
Any Viking/ Excal bodies,03 eye covers, used cartridges
PM UL frame
|
|
|
|
|
08-17-2006, 12:18 PM
|
#5
|
|
Paintball ruined my life
Join Date: Mar 2005
Location: Chicago
|
66B Acid gets MUCH better final finish results than battery acid. Its not pre-dilute, but theres less crap in it.
|
|
|
|
|
10-02-2006, 10:28 AM
|
#6
|
|
Engineer
Join Date: Aug 2001
Location: Baltimore
|
I added a page to my website about home anodizing, hopefully it will help some people out. I still need to get some pictures of parts I've ano'd and do a writeup or more advanced things like masking off parts or fades.
Any other anodizing veterans out there who would like to check my page for errors or give me feedback, please feel free.
http://www.engineeringhobbyist.com/p...eted/anodizing
__________________
Ex-University of MD Terps player -I gotz a degree
|
|
|
|
|
05-02-2007, 12:14 AM
|
#8
|
|
STUBBSSTUBBSSTUBBSSTUBBS
|
__________________
Pod Bandit Club Member #6!
Don't add oil to your fill nipple... the life you save, just might be your own.
!!!Huge Gearbag Sale!!!
TRUST
Just tell your team you forgot to turn on your gun because you were too busy getting high, They'll understand. P|A|I|N|T|B|A|L|L my second drug.
|
|
|
|
|
05-23-2007, 11:28 PM
|
#9
|
|
Join Date: Jan 2005
Location: Qualicum Beach , BC, CAN
|
Here is a simple overveiw of annodising that i wrote up as a high school metal shop project it provides a basic overveiw of annodising and how to do it
Ryan Key Anodizing
Anodizing is an "electrochemical conversion process" that changes the outer structure of the metal, rather than an applied coating, like paint. The anodizing of aluminum is performed by making the part that is to be anodized, the "anode" or positive end of an electrical circuit within an acid electrolyte. With electricity applied through the acid from the cathode an oxide layer develops in and on the outer layer of the metal. This outer layer can be formed so that it has a porous quality and the aluminum oxide layer can be dyed in many colors. Basically you are performing electrolysis with water, splitting H2O up into hydrogen gas and oxygen, however instead of the oxygen being released as a gas it is instantaneously reacting with the aluminum creating a dense layer of aluminum oxide.
Aluminum, on exposure to air naturally develops a thin aluminum oxide film that seals the aluminum from further oxidation, unlike steal where the iron oxide flakes off and allows more oxidation to occur. This oxide layer is thin and poorly adhered to the surface of the aluminum. It adds essentially no protection or surface hardness where as anodizing makes a much thicker oxide coating, up to several thousandths of an inch thick. Because anodizing adds surface hardness, it has permitted aluminum to be used in applications where it wouldn't have been considered before. Infact aluminum oxide is one of the most common abrasive mediums used in sand paper. After anodizing the added depth of the oxide layer improves the aluminum's corrosion resistance, while making cleaning of the surface easier and potentially if the metal is dyed, more attractive.
Anodizing is sensitive to the type of alloy. For example, alloys for die casting have a lot of silicon, which makes it pour and mold well, but it makes anodizing almost impossible.
There are several different types of anodizing Type 2 which is what I will explain how to do, type 3 or hard anodizing and Chromic Anodizing.
Type 2 is characterized by
Moderate Durability
Excellent Dyability (yielding deep, rich colors)
Electrical Insulation
Compatible with almost all types of aluminum except for high-silicon die-cast alloys such as 380
The less alloying elements there are the higher the clarity and depth of color
Type 3 is characterized by
High Durability (file hard, 60-70 on Rockwell C-scale)
Electrical Insulation (800 V / mil thickness)
slight Dyability (dark colors)
works very well with 6000, 5000, and 7000 series alloys.
Chromic Anodizing is characterized by
being low thickness, (it can be an advantage of parts with tight tolerances)
Chromic acid is less aggressive towards aluminum and is better for some applications
It is also effective at protecting from salt spray as is type 2 and 3
How to type 2 anodize a suitable aluminum part
First the parts to be anodized are degreased. All oil, dirt, glass beads, etc, must be removed prior to the anodizing process. This can be done by thorough cleaning with acetone and methanol (or soap however you must be very careful to rinse theroly).
The next step is to etch the parts in a dilute solution of lye (approx 5%) (NaOH) for 10 to 30 seconds or longer if matte finish is desired, rinse.
Then desmut part at room temp for 1 to 3 min using an industrial desmut solution if previously etched or alloy calls for it such as (2024 alloy), then rinse.
Finaly after rinsing you can now start to anodize the part. You need a solution of 15-20% or 2.7-3.6 molar H2SO4 (sulfuric acid).
20% concentration = 3.6 molar H2SO4 = 1 part 18M H2SO4 per 4 parts water
You then need a power supply capable of putting out 12 volts or up, this can be as simple as a car battery or you can use a proper power supply. Then you attach your positive lead from the power supply to the piece to be anodized (anode) and the negative lead to a lead sheet or aluminum sheet (The cathode). Then both are suspended in the sulfuric acid. It is best to try and keep the solution as cold as possible without going below 10 degrees Celsius to decrease the rate at which the sulfuric acid reacts with the aluminum oxide and to try and keep the resistance as low as possible across the solution. Also in extreme cases the aluminum may become pitted if the temperature gets too high.
Now to set the current density, you should anodize at a current density range of 4 to 12 amps per square foot of part. Adjusting the acid ratio, cathode size and voltage will affect how much current is drawn during anodizing.
Also we need to know how long to anodize the part for, you use the rule of 720 amp minutes per square foot of part. So lets say that the part is .5 square feet and is drawing 6 amps according to the meter on your power supply (or a multi meter),
So you take our constant 720 and divide it by how many amps we are drawing 6,
720 / 6 = 120 and come out with 120 minutes per square foot we then take 120 and multiply it by the number of square feet we have .5 120 * .5 = 60 minutes. Then we know that if we have .5 square feet of parts and we are drawing 6 amps we should leave the part in the bath for approximately 60 minutes or 1 hour.
Often you can use a simple system with a light in series with the anodizing process to reduce the current running threw the bath if you need to, also the light is a good indicator of when the part is finished because as the part gets closer to being finished the conductivity will decrease and the light will dim.
Once the part is finished rinse, rinse and rinse again as even a small amount of acid in the dye can damage the dye and render it unusable. Make sure to only rinse with cold water as hot water will cause the pours in the aluminum oxide to swell and not accept and of the dye.
Then Dye part in 140 degree dye for 15 seconds to 15 min, rinse
Finaly seal the part in 180 degree Nickel Acetate sealer for 10 to 20 min, rinse and hang to dry. Sealing causes the pours in the aluminum oxide to swell trapping the dye inside, as well as making the anodizing harder and more resistant to wear. It changes the film from gamma aluminum oxide a hydrated form called boehmite.
Sealing bloom or sealing smut formation is a side effect of the sealing reaction, and it represents the formation of boehmite crystals at the film surface. It is usually invisible until the surface is dried. On colored work, particularly the darker colors, it appears as a heavy velvety smut layer which is irregular in appearance. Sealing bloom never appears unless sealing has been well performed and constitutes therefore a guarantee of good sealing. This layer can easily be removed and has little effect on the appearance of the part after it is buffed away.
Often after anodizing the part will not be very shinny so if you desire a glossy finish you can buff it until the desired result is achieved. It isnt likely that you will be able to buff threw the anodized layer unless you are very careless or didnt leave the part in for long enough.
* The anodizing process was developed in the 1930's.
* Can be spelled either anodizing or anodizing depending on which dictionary you use (American or British)
* was used in one of the world's tallest buildings the Sears Tower in Chicago, Illinois.
* is used to protect satellites from the harsh environment of space.
Safety!!!
Note: Baking soda can be used to neutralize spilled sulfuric acid. Just sprinkle it on until it stops fizzing.
Also good to note is that when working with lye you may get it on you and not even realize it because it doesnt start to hurt until after it has done a lot of damage. It may be a god idea to keep some vinegar or even dilute sulfuric or hydrochloric acid around so that if you do spill some lye onto yourself you can neutralize it before it can do more damage to you. Acid is actually safer than lye!
Acid you can simply rinse away with lots of water however lye as with most bases is difficult to wash away without neutralizing it.
REMEMBER ALWAYS POUR THE ACID INTO THE WATER SLOWLY NEVER POUR THAT WATER INTO THE ACID!!!
(OR IT MAY VERY LIKELY SPRAY VIOLENTLY COVERING EVRYTHING WITH CONCENTRATED ACID)
Also always wear safety equipment when working with acids or bases (i.e. safely glasses or face shield as well as appropriate gloves (not leather or cloth))
If you ever get acid on your skin or in your eyes flush thraly with water for 15 minutes and try to get help.
|
|
|
|
|
06-26-2008, 08:06 AM
|
#10
|
|
Electromech. Engineer
|
when posting a anoed piece in the dye do you ned to use the battery here too or is that just for the acid. Also where do you use sodium suphate? I noticed it was mentioned in the needed materials but i didn't notice it anywhere in the walk through. One more question, what store or type of store should i be able to purchase lye at?
__________________
KM FACTORY D3
Sponsors:
KM Straps and apparel
LVP -- Kee action--Valken
DJ productions
|
|
|
|
|
05-01-2011, 09:56 PM
|
#11
|
|
Vagatarian
Join Date: Nov 2002
Location: Central Florida
|
Good info here I would like to add that the sealing process temps of around 170 degrees or higher
Frozen water bottles work great to keep the temps down in the acid bath
You can leave parts in too long eventually it gets to a point where the acid eats the annolayer as it's being deposited and can pit your piece
Polishing the parts will yield the best results for a glossy finish buffing wheel or a polishing drum for lots of parts
Time in the dye bath can range from 15- 45 min for a nice deep color
Spraying doesn't work well because you need a long contact time to dye the surface fully dying should be done at cool temps because you don't want to close the pores before the dye takes
Old colman coolers work perfectly as containers for your dye baths 5 gallon buckets with lids are another way to go you can seal the buckets or close the cooler lids and reuse your dye baths
Using a bucket heater or a turkey fryer to heat your sealant makes life easier but you can microwave if you have to
Line your cooler for the acid bath with a lead sheet cathode on the bottom
1 cathode on each side works best make some wire racks to place inside the cooler ontop of the cathodes this will transfer electricity quite efficiently
Al wire is much better for making your connection as you can thread it into a screw hole or double it back on it self and slide it inside the marker body where you won't see because wherever you make your contact it won't take anno or dye
You can make titanium racks there more expensive but you can reuse them with almost no maintenance aluminum racks need to be stripped before each run
Drain cleaners with lye in it will strip and etch your parts soak for about 45 min and use a brush to expose fresh surface and the lye will work faster
You can place yarn or strings or sponges to make some cool effects
Just a few tidbits to share hope it was helpful
Last edited by bgnorm69 : 05-01-2011 at 10:04 PM.
|
|
|
|
|
05-12-2011, 05:04 PM
|
#12
|
|
Join Date: Feb 2004
Location: in the rain
|
Quote:
Originally Posted by bgnorm69

Drain cleaners with lye in it will strip and etch your parts soak for about 45 min and use a brush to expose fresh surface and the lye will work faster
|
I strongly caution against leaving the part in lye stripper for too long.
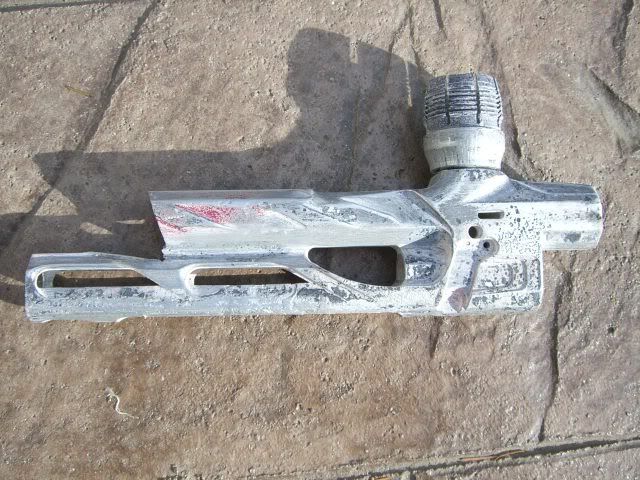
Soak for 1 minute then pull and scrub with a toothbrush. Repeat until stripped. Once it's stripped, rinse well, and then pull and dry the part off... don't let the part sit in the rinse water, or pitting may occure.
A customer did his own stripping (yikes!) and sent this to me:
__________________
Exercise your constitutional rights, but keep your laws of of mine.
|
|
|
|
|
09-12-2012, 03:51 PM
|
#13
|
|
|
join the caswell plaiting forum and anodizing101 yahoo group.
Caswell some great guys to help you out and the yahoo group has a ton of literature.
Not many people anodize to the full 1mil. Most manufactures don't even do that.
Even so when you anodize you are never extending the matrix a full thousandth of an inch. It is commonly said that the matrix extends at a 60:40 split. Meaning the pores extend into the substrate %40 of over all anodizing layer. So when you anodize to the full one mill you are only growing the surface roughly .6mil
I never anodize to the full one mill unless I know the exact surface area. For black or dark colors I run to .75mill. For light or clear I run to .25-.5
|
|
|
|
|
10-30-2012, 05:39 PM
|
#14
|
|
lukylovespainbtallin
Join Date: Dec 2011
Location: Massachussetts
|
Quote:
Originally Posted by SilverLCDBushy
There are several methods of producing the anodised finish, all differ a little in the chemistry used to achieve the porous/non-porous oxide layer. All use noxious chemicals (it's just that some are more noxious than others!). The method listed below involves the use of some fairly powerful reagents so in all cases wear eye-protection (goggles etc.,) and rubber gloves. There is no danger provided you are careful and handle the chemicals with respect - keep the containers covered and make sure youngsters can't accidentally knock them over. There is nothing particularly difficult about this process, and having ironed out the practical bugs the biggest problem became how to deal with the larger parts. I reckon the best shape of tank is long and narrow (say, 18 inches long by 3 inches wide, and perhaps 6 inches deep).
You will need the following items:
* A plastic, glass or lead tank to hold the acid bath (all tanks need to be of a size to hold your largest part).
* A few plastic or glass tanks to hold the dye bath.
* A plastic or glass tank to hold the etching solution.
* A container (Ceramic is the best) in which you can boil the parts in water.
* Lengths of pure aluminium rod to suspend the parts in the acid bath (aluminium welding rods are good) (And aluminum wire is good,but hard to find)
* GP Plates form Caswell Inc (These are the best money can buy,cheap too!).
* 12V DC power supply (Battery charger or car battery is OK (2 are even better - see below)
* Set of leads and crocodile clips ( < The Best choice) to make the electrical connections (make sure they are rated for at least 20 Amps, auto jump leads are great for really heavy currents)
* Protective clothing (latex gloves, goggles, apron).
* Somewhere to work! - preferably with a stainless steel sink close by. And somehwere you can mess up.
The chemicals you will need are:
* Battery Acid (Can be obtained from Napa Auto Parts)
* Sodium suphate (30 grams per litre of acid solution)
* Sodium hydroxide (lye) at about 10%-20% w/v.
* Dyes from Caswell Inc (Lots of Colors).
DYES:
The dye is the critical component for coloured finishes. If you are not fussy about exact colour matching then several vegetable-based clothes dyes can be used, I've also had some success with diluted writing inks. The toughest colour to achieve is a truely dense black. Black vegetable dyes produce a gold/brown colour, black inks only produce a dark blue colouration at best. If you get the dyes from caswell youll haveve no problem!
REAGENTS:
The acid bath contains 10-25% (V/V) sulphuric acid. Recently, I've been having good success with 10% acid so there probably isn't much need to to higher concentrations. Maybe the 25% will speed the operation up but 25% sulphuric acid is fairly nasty stuff to have lying around in any quantity. A recipe I saw suggested adding about 30 grams/litre of sodium sulphate to the acid bath, but I've had good results without it. If diluting from full-strength (concentrated) acid then you MUST add the acid slowly to the full volume of water, mixing all the time. This is a highly exothermic reaction and the solution will become hot. Never start by adding the water to the full volume of concentrated acid or it may become so hot at first that it may boil and spit acid at you! Sodium hydroxide is available in pellet form, simply dissolve in water to give the 10-20% solution (again, the solution will get quite warm as the pellets dissolve). The active component of many drain cleaners is also sodium hydroxide and will perhaps do as well. Keep the acid and alkali baths well separated! Always wear rubber gloves for all processes to avoid skin contact - including the dye which, if using a histological stain, is particularly difficult to remove.
APPARATUS:
The tanks should be filled to about 2/3 capacity with the relevant solutions. The acid bath requires 2 electrical connections, one is the anode (positive) side which goes to the workpiece to be anodised, the other is to an aluminium plate immersed in the acid which acts as the cathode (negative) terminal. I used some 2" x 1/8" aluminium strip, bent to shape such that it passed down one side of the tank, across the bottom and up the other side. If you are using a lead-lined tank then the lead itself will provide a good cathode. Nothing other than lead or aluminium should be used in the tank. For power I used two 12V auto batteries (55 AHr each) which could be connected either in series (to give 24V) or in parallel to provide high current at 12V Or a battery charger with Alligator clips. Deep-cycle lead-acid batteries would be better as these are designed to run from fully charged to nearly discharged, ordinary auto batteries should never be allowed to fully discharge. A real problem is to maintain a good electrical contact from the anode to the workpiece. If the part has a tapped hole, then I found the best way was to squeeze the end of the aluminium welding rod (about 3/32" diameter) in the vice to form a spade end, this could then be screwed into the tapped hole. Other than that, the workpiece has to be wrapped tightly with the wire. The problem is that as the oxide layer forms it is possible (if not likely) for it to interfere with the electrical contact - I found that a good initial contact sometimes degraded until little current was being passed. Obviously, take care the workpiece does *not* touch any part of the cathode plate in the tank or it will short the battery.
PREPARATION:
The workpiece to be anodised needs to be clean and completely grease-free. Any fabricated components need to be dismantled, otherwise acid will tend to get trapped in recesses and will cause corrosion at a future date. You can either thoroughly clean the part with a de-greasing agent (alcohol, acetone, SP Degreaser from Caswell etc.,) or if the workpiece is freshly machined it can be anodised right away (avoid touching it with the hands). I generally use the sodium hydroxide bath to both clean and etch the surface, 30 mins in the bath will produce a semi-matt finish, 5mins will leave a shiney finish. However, leave it too long and the whole thing might dissolve. Wash under the tap before placing in the acid bath. To form the oxide layer will require about 1.5Amps per 3-1/2 square inches of surface area. So, a large-ish part 6 inches square would need about 20 Amps - a high current!! Think about that before dunking your engine block in a big tank! Note: the process works best at lower temperatures, 'hard' anodising is done at 3 deg C. Putting 20 Amps or so through the bath tends to heat it considerably.
ANODIZING:
OK., you have the part suspended in the acid bath using aluminium wire, and the cathode is connected to the negative terminal of the battery. I use no current control, and a part of any given size will draw a current as indicated above. There will be (should be) fine bubbles released from the cathode during the process, and the workpiece will take on a milky-grey appearance as the oxide layer forms. It will take 70 minutes to form a layer of the correct thickness for black dying, about half that for a decorative coloured finish.
IMPORTANT NOTE: If the part has an etched or otherwise rough/matted finish then the effective surface area may be UP TO TWICE that which you may have calculated from the gross overall dimensions. Take this into account when estimating the total time for the electrolytic formation of the oxide layer.
After the time is up it's merely necessary to remove the workpiece from the acid bath, rinse it under the tap to remove excess acid, and dunk it into the cold dye bath. Some sources suggest you might need to boil the dye bath but it works fine for me cold. Of course, you don't *have* to dye the anodised part - clear anodising still offers good protection from corrosion. Leave the part in the dye for about 15-30 minutes then hook it out and rinse it under the tap. The part should still retain the colour after the rinse (if not, something's gone seriously wrong somewhere - probably you lost the electrical connection part way through). After rinsing place the the part into a pan of boiling water for about 30 minutes to permanently seal the surface. Or use the sealing agent from Caswell Inc.
And that's it - you can add a little more protection to the finish by polishing with wax or lanolin.
Here are a few pictures of my setup...
~InvertedPB aka SilverLCDBushy
|
helped alot thanks |
|
|
|
|
12-17-2012, 08:08 AM
|
#15
|
|
STAY EVIL!! OMEN &amp; PIMP
Join Date: Nov 2012
Location: Tiverton, RI
|
So factory paintball guns and parts that have scratches have to be stripped and then re-anodized is that what you guys are saying? I thought there was an easy touch-up kit with different colors out there... Everyone should read this thread and then they would really take care and not scratch their guns and parts all up. Thanks for the info
|
|
|
|
|
12-25-2012, 01:29 PM
|
#16
|
|
Join Date: May 2009
Location: Middle of Nowhere, Wy
|
where can i get lye or phosphoric acid for the stripper? that wasnt talked about much here. and would a 10amp charger be ok for annodizing a halfblocked cocker body? or do i need more juice? i could maybe double it up, and anno my feed neck collar, frontblock and vert asa at the same time...
__________________
black to gold '05 ICD lasoya promaster dual gauges killa board
04 e2 prostock halfblocked and minied, angel feedneck STO ram, jackhammer II, empire drop
The Cocker Haiku:
Did it work before?
You screwed with it, didn't you?
Got what you deserved.
Last edited by neal6 : 12-25-2012 at 02:26 PM.
|
|
|
|
|
01-07-2013, 02:01 PM
|
#17
|
|
Herbal Cultivar M.D.
Join Date: Sep 2004
Location: Phoenix, AZ
|
Out of curiosity does anyone know the average cost for the startup materials for a home anodizing setup? Basic materials, solutions to do say 1-2 colors to start and so forth?
Didnt know if anyone had priced out all the basic materials for like a startup kit for home annodizing...
__________________
"The Harder the World, The Fiercer the Honor."
ICD-Owners
|
|
|
|
|
03-28-2013, 12:35 PM
|
#18
|
|
#12 SKPB
|
That's cool.
__________________
SCOTTSDALE KINGS #12 TEXAS BORN
HOUSTON HEAT
|
|
|
|
|
07-02-2019, 04:19 PM
|
#19
|
|
InvertedPB Owner
Join Date: Sep 2002
Location: NOR*CAL (916)
|
Stumbled upon this place once again almost 6 years later...debating on getting back into the sport.
Can't believe this is still up, go mods!
|
|
|
|
 Posting Rules
|
You may not post new threads
You may not post replies
You may not post attachments
You may not edit your posts
HTML code is Off
|
|
|
|


 Your Privacy Choices