|
Archived Thread - Cannot Edit
|
 02-21-2005, 07:33 AM
|
#1
|
|
Guest
|
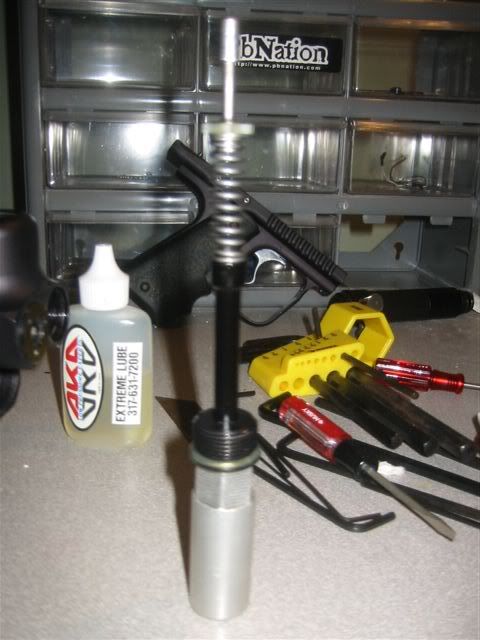
Nitros How to disassemble and clean a viking
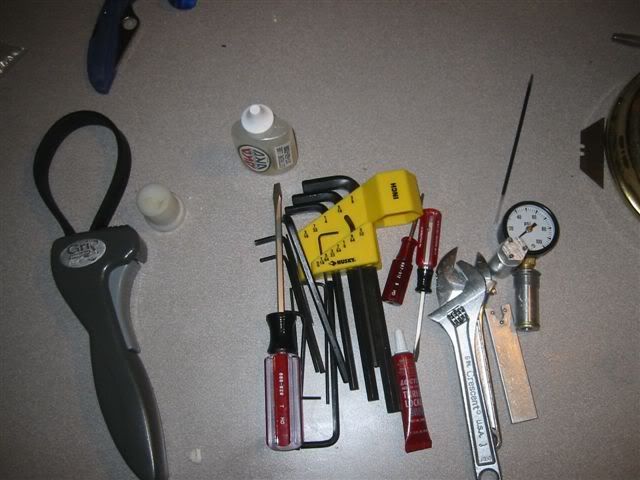
What do you need?
American Allen key set
AKA Tool kit
Locktite
Cresent wrench
Flat head screwdriver
AKA Extreme lube
Strap wrench
Some towels to whipe things down
And of course A viking:
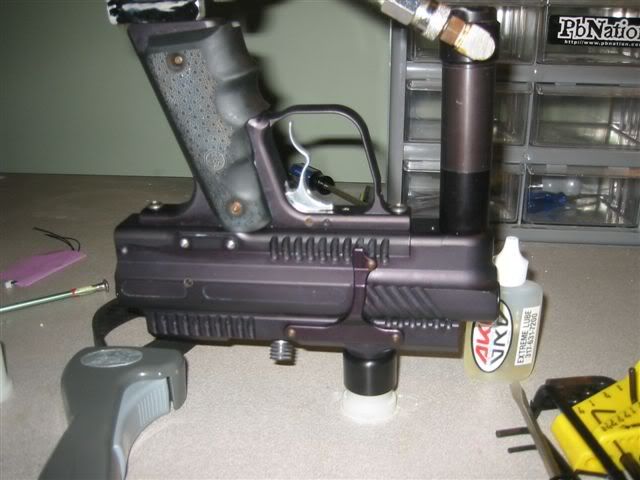
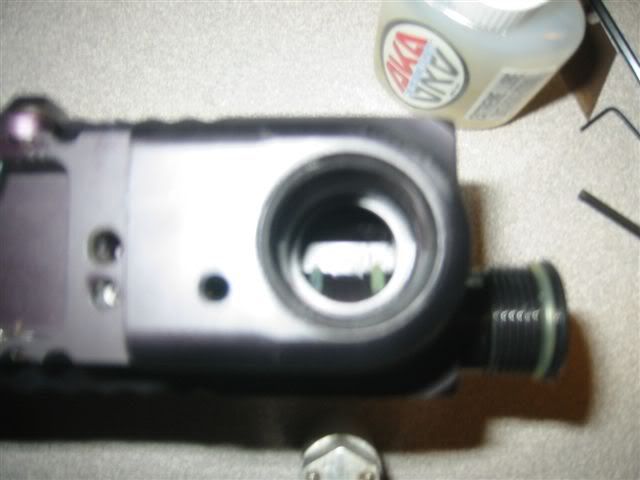
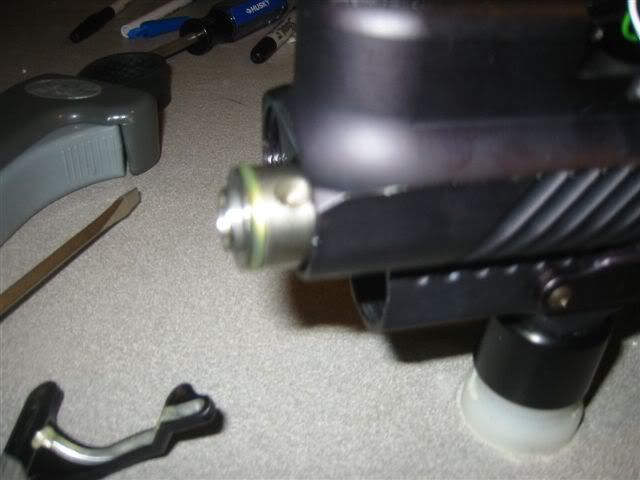
First step is to take off the sidewinder, rail/onoff or asa, if you have one. Take off the frame, and it should open up to this:
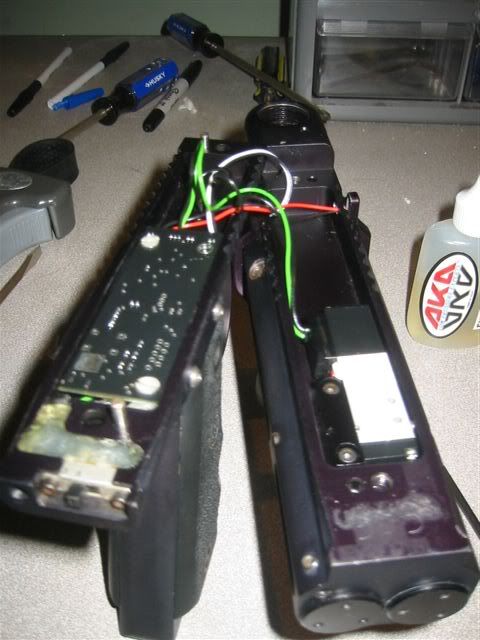
Take out the plugs, Dont pull on them, Use a flat head screwdriver and kindof ply them out on the top of the plug.
After thats done, You have a body left, If you want you can take off the eye covers off, or leave them on, I was gonna take them off, but one of my screws were stripped.
I start off by takeing the hammer out, You should unscrew it untill it stops unscrewing, Then put the boltpin infront of the hammer, twist and pull doing this:
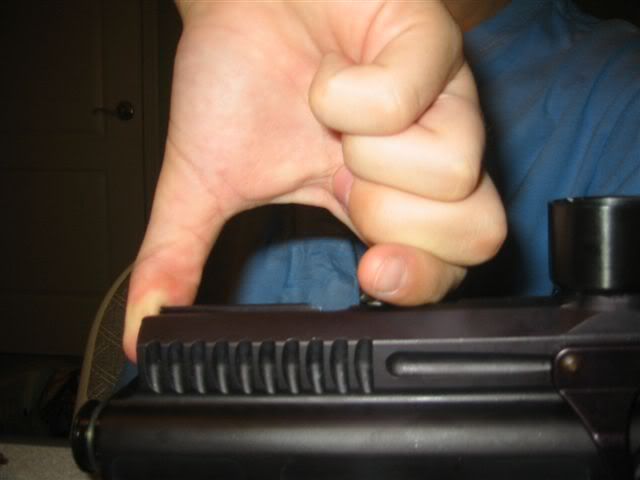
Twist and pull on the hammer, and pull on the pin, it should slide out.
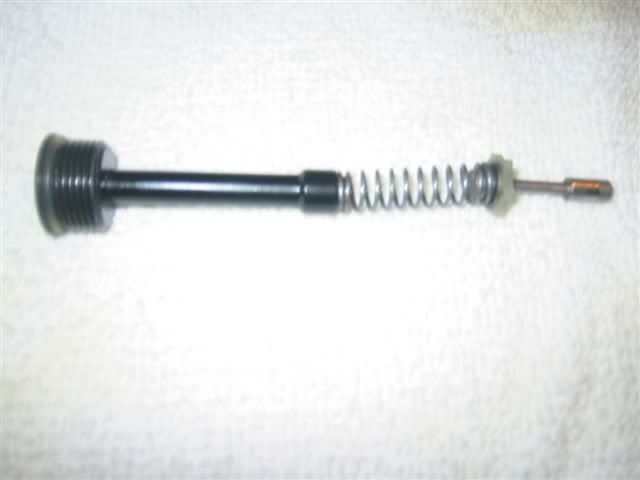
Next I take the cupseal, spring, and valve pin out, Not that hard to do, Just unscrew the front cap (next to the LPR), and it should fall out to look like this:
Last edited by yakitori : 09-07-2006 at 07:16 AM.
|

|
|
 Sponsored Links
|
Remove Advertisement
|
|
Advertisement
|
|
|
02-21-2005, 08:08 AM
|
#2
|
|
Guest
|
Sometimes the vavle pin doesnt come out right away, but it will sooner or later.
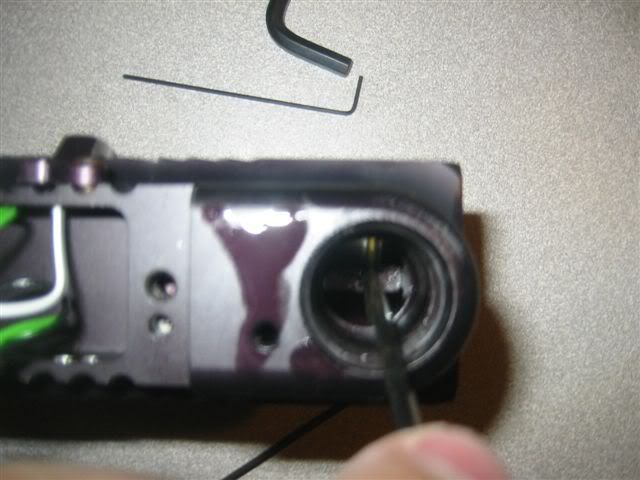
After that, You can pull the LPR out, This is the tricky part, When you pull the LPR out the orings can be clipped, When you look in the sidewinder port, after you start to pull the LPR out, It should look like this: (NOTE: if you have an SCM...take the scm top off and if you do not have an SCM removal tool, get some small needlenose pliars and unscrew your SCM. Careful not to scratch up the inside of your SCM)
As you can see (kind of) the orings are being pushed out, and when you pull it out it can be clipped, You can take an allen key, and push on the orings as your pulling it out to help it slide by, (Sometimes dropping a few drops of lube in the port helps.) It's tricky and takes time to learn how to do it, but if you take your time, you should be able to pull it out, When you do whipe it down. Next step is to take the other cap off (Right next to the hammer), There isnt any big deal about this, just pull it out.
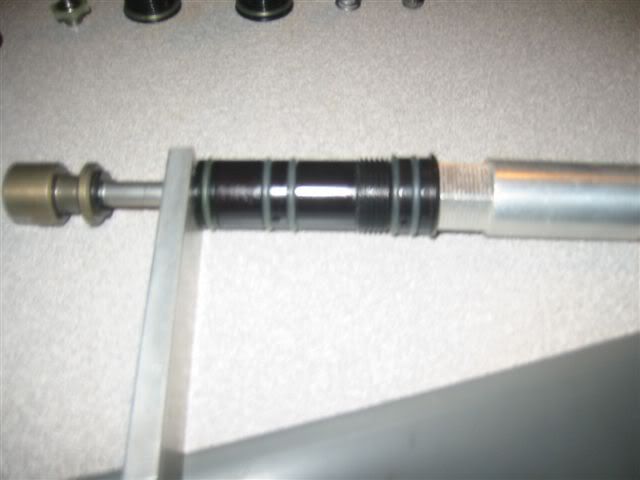
Next step, To take out the valve, There is a risk of clipping the orings like you did on the LPR, your takeing it out of the front of the marker, You need to unscrew the valve screw (non-detent side of marker), You need something long enough to push it out of the marker, Dan Voils patented "dowell rod" (wooden stick, basicly) I use the same thing. You can just about use anything aslong is its not damageing the valve. When you push it out of the front, You'll have the same deal as the LPR, just slowly push it out, and try not to get the orings clipped.
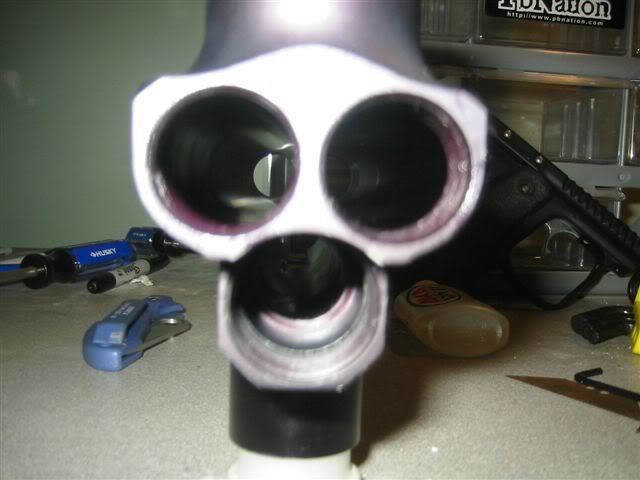
After you get it out, Whipe down all the parts with a towel, The inside of your marker should look like so:
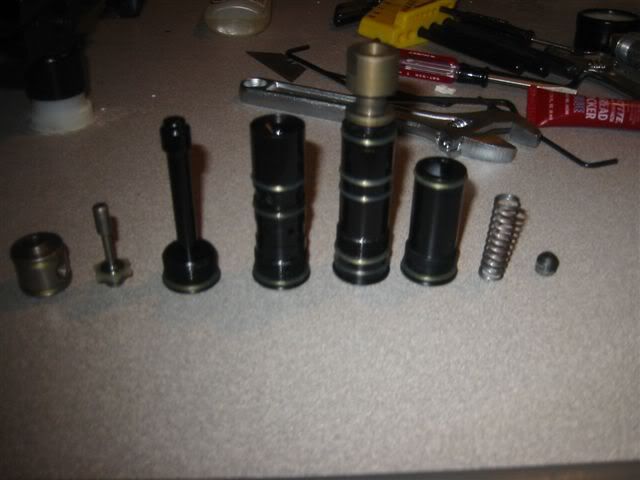
Heres all the parts that you just took out:
I'm not gonna get into the in-depth stuff, (takeing apart the hammer, since mines locktited shut)
The reason why I said to have a cresent wrench is because sometimes its hard to start unscrewing the end caps, You can use the cresent wrench on the 3pin tool to help unscrew it.
EDIT: on 03 cartridges you need the spanner wrench to unscrew the cap. I am not positive, but I think 04s have a hex cap and you can use a wrench (cressent).
Here is the general idea to remove the cap. Careful not to scratch up your cap on the 3 prong tool side. If it slips a prong will score the hell outta your cap. And it shows....
Okay, So far, You've gotten everything out, Now you just need to put everything back in, First step, the valve, After whipeing it down, Lube the valves orings, spread it around the orings, Start putting it back in to the front of the marker, like so:
As you can see, the small dip on the valve is faceing where I am gonna screw the valve screw into the body. Make sure the bigger mouth end is faceing the FRONT of the marker, I've put it in backwords many times, Normally I catch it before I screw it in but I have put air through it, it just leaks alot.
You have to go through the same drill when you put the valve back in, You are risking clipping the orings, You have to do the lube/allenkey trick, While pushing in the valve, you have to push the oring down, (one by one) Kinda like this:
Last edited by yakitori : 09-07-2006 at 07:24 AM.
|
|
|
|
|
02-21-2005, 08:10 AM
|
#3
|
|
Guest
|
It's tricky, takes a while to get it, but you can do it. If you do clip an oring, do NOT use a tank oring on the valve, you have to get new orings from AKA, the size are 015 urathanes, (same for the LPR, and hammercartridge)
Once you get the valve past that part, now you have to push it to the hole when you put the valve screw into, Once you get it there, its not always lined up, Just take an allen key and kinda push it to line it up, Thats kinda tricky too, but you'll figure it out.
Put blue locktite on the screw, and screw it in, Screw it in all the way, then look inside, if you see something like this:
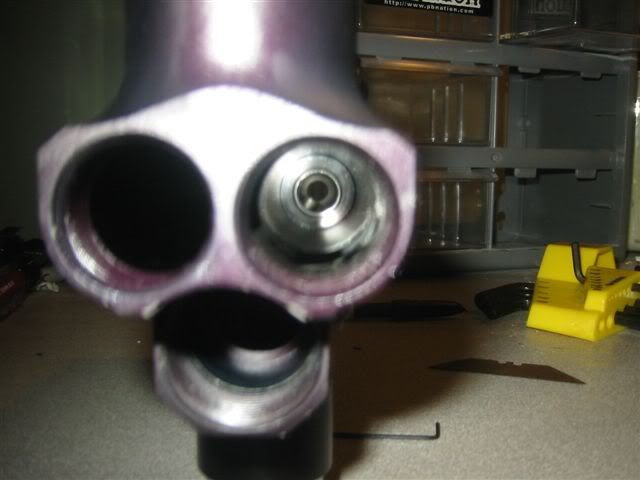
You cant really tell, But the valve is being pushed up against one side of the wall inside the marker, causeing it sometimes to leak, Just back it off a tad but so it wont leak. You do this by airing up the gun after its assembled and adjusting the valve set screw until it seals properly.
Next is the LPR, This is the second worst part, after this, You will blow past everything else, You have to do the trick getting the orings past the sidewinder input, Lube the crap out of the orings, then start to push it in, take an allen key, push the front oring down and start kinda twisting, and if you start to pinch pull out and start again, its tricky, takes a while to learn. The next one you have to do while screwing in, Its not too hard, but if you start to pinch you have to unscrew it, and try again.
Next is the cupseal, spring, and valve pin, it should go in in this order:
First, Drop the valve pin in, Thats the only thing that you really need to get lined up, Just make sure it drops into the valve, Then drop the spring in, and put the cupseal in, Start to screw it in and most the time if it isnt lined up, it'll pop into place halfway threw screwing it in.
Next is the hammer cartridge, Just lube the crap out of the orings, and start to screw it in, Its not that hard, just lube the orings so next time you pull it out, it wont get stuck in the solenoid passageway.
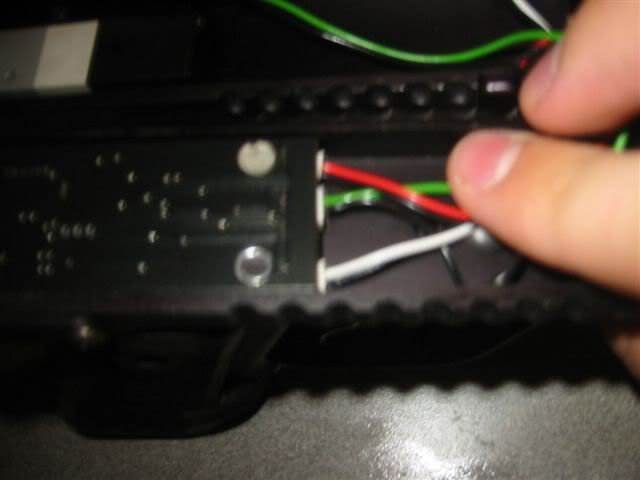
Then just put the cap on next to the hammer cartridge, and your set. Put the trigger frame back on, When you plug everything back in it should look like this:
Last edited by yakitori : 09-07-2006 at 07:39 AM.
|
|
|
|
|
02-21-2005, 08:24 AM
|
#4
|
|
Unbanned
Join Date: Nov 2002
Location: Maryland
|
 :tup:
:tup:
__________________
I am Spartan X. Then I was Spartan II I'm Back.
Old Feedback
My Lifestyle Determines My Deathstyle.
|
|
|
|
|
02-21-2005, 09:13 AM
|
#5
|
|
Lurking in a bush near U
Join Date: May 2004
Location: Remington, VA
|
Please sticky!
|
|
|
|
|
02-21-2005, 10:00 AM
|
#6
|
|
Guest
|
I have these saved on my computer, so If I ever need them again, I can copy and paste them from word. It will take about 5 minutes.
I will also see if I can find the pics for the Excal.
Thanks
|
|
|
|
|
02-21-2005, 11:11 AM
|
#7
|
|
Lurking in a bush near U
Join Date: May 2004
Location: Remington, VA
|
sweet  |
|
|
|
|
12-21-2005, 12:24 AM
|
#8
|
|
get off my lawn
Join Date: Apr 2005
Location: Alabama
|
Pics don't work any longer.
|
|
|
|
|
12-28-2005, 06:53 PM
|
#9
|
|
Join Date: Dec 2004
Location: Wisconsin
|
Pics dont work for me either.
|
|
|
|
|
01-02-2006, 09:53 PM
|
#10
|
|
Guest
|
plz fix the pix.
|
|
|
|
|
01-04-2006, 07:57 AM
|
#11
|
|
Lurking in a bush near U
Join Date: May 2004
Location: Remington, VA
|
I can host if need be.
|
|
|
|
|
01-08-2006, 12:44 PM
|
#12
|
|
Guest
|
The picswould be very helpfull
|
|
|
|
|
01-29-2006, 11:14 AM
|
#13
|
|
Guest
|
|
|
|
|
|
02-23-2006, 12:14 AM
|
#14
|
|
PB4LIndustries
Join Date: Sep 2005
Location: [714] SoCal
|
Pics!
|
|
|
|
|
03-20-2006, 03:33 PM
|
#15
|
|
Lurking in a bush near U
Join Date: May 2004
Location: Remington, VA
|
Yaayyy Thanks man. I'll copy/move them to my FTP site in a while.
|
|
|
|
|
09-07-2006, 10:21 AM
|
#16
|
|
Guest
|
edited the original thread w/ pics and instructions.
hope that helps.
I also added some minor comments on some parts. Nothing major though.
I didnt get the chance to make my own when I reassembled my viking after anodizing. I put it together in a hurry to try and get it ready for nightball, I didnt make it. When I got home, it was mostly complete, so I didnt get any pictures.
I will do it though when I get a chance to take it apart. I think this thread is pretty straight forward though. Only thing you really need to watch for is clipping your orings on the LPR/SCM and the valve when taking it out of the front of the marker. Just take the reg off and use something to keep the orings from getting pinched through the ASA.
|
|
|
|
|
03-27-2007, 05:04 PM
|
#17
|
|
Guest
|
whew. thanks a lot. this will help me when i get an anno job.
|
|
|
|
|
04-15-2007, 11:26 PM
|
#18
|
|
Too tall 4 bunkers.
Join Date: Dec 2004
Location: San Diego, Ca
|
Could someone sticky this?
|
|
|
|
|
06-28-2007, 08:49 AM
|
#19
|
|
|
Hate to necro-post, but how often should this be done?
|
|
|
|
|
06-28-2007, 08:56 AM
|
#20
|
|
CondomDealerExtraordinair
Join Date: Jun 2003
Location: Hell, NJ
|
never unless it doesnt work
__________________
CU Boulder is awesome
I love dirty dirty house music....
|
|
|
|
 Posting Rules
|
You may not post new threads
You may not post replies
You may not post attachments
You may not edit your posts
HTML code is Off
|
|
|
|


 Your Privacy Choices